...
For easier/faster processing of your files, follow the steps below to submit documents to your back office and providing file information.
Your file will not be visible to the back office until you have submitted an activity.
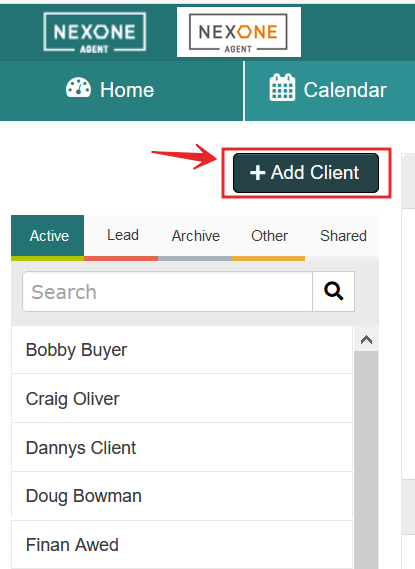
Click Add Client
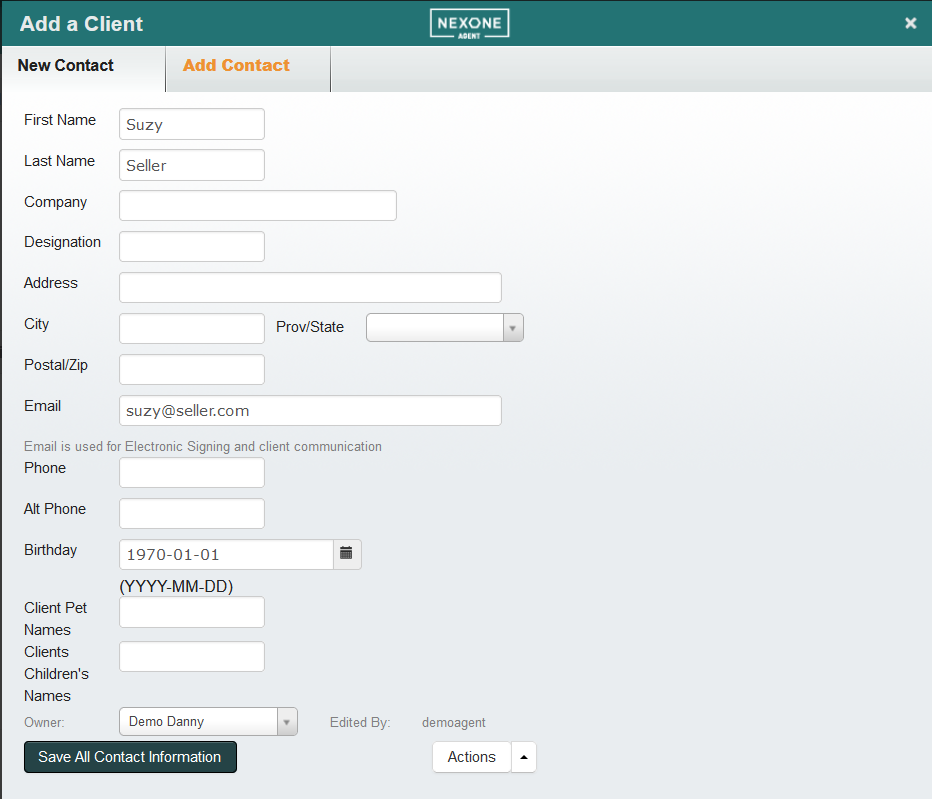
Fill out necessary client information & Save All Contact Information

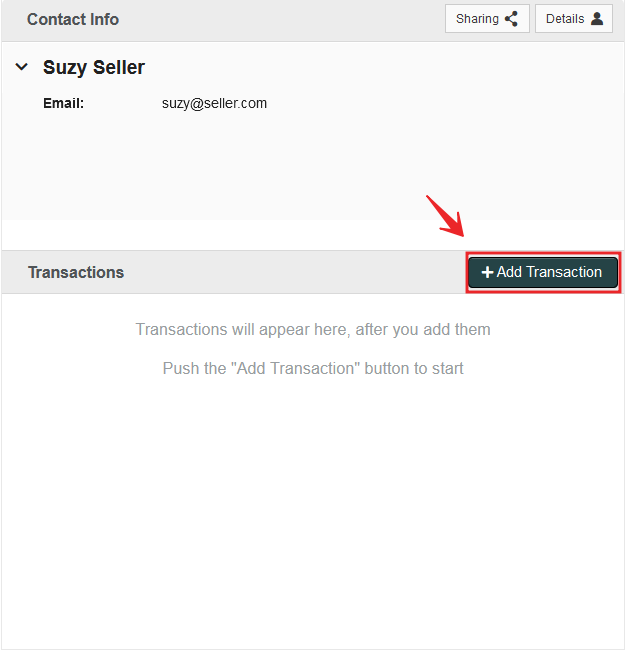
Click on Add Transaction

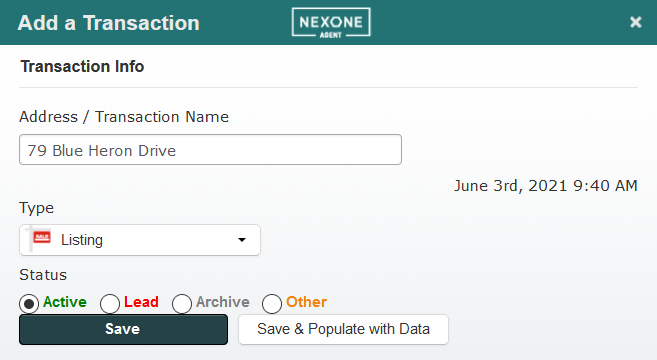
Enter in the Transaction Name (normally property address), and select the type and status of the Transaction file. Then hit Save. You can also use this opportunity to populate the trade sheet using an MLS ID or Property Address (Ontario only)

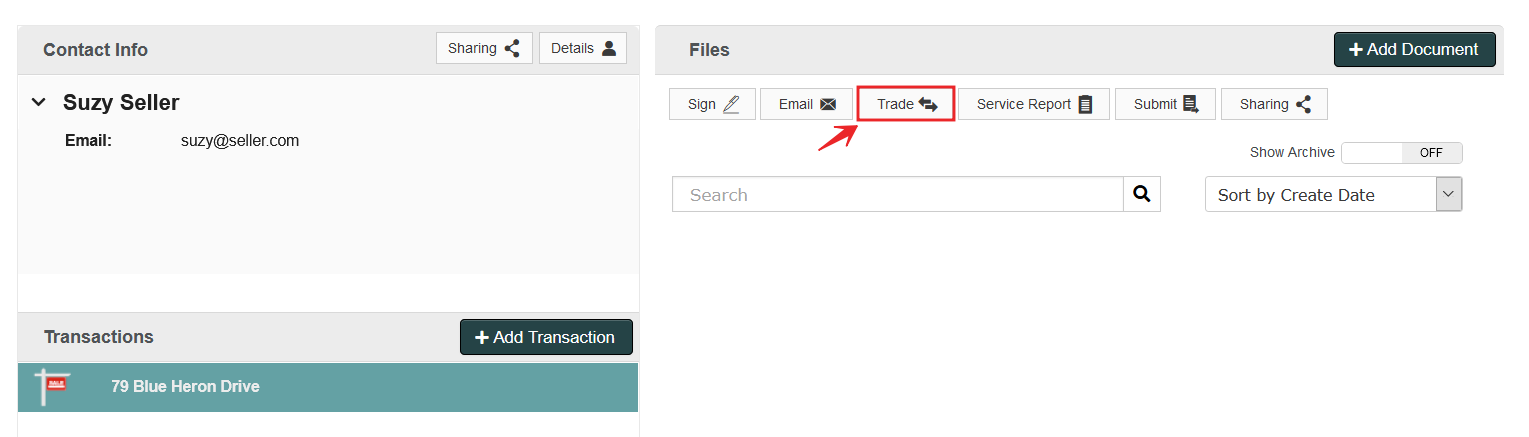
Navigate to trade sheet by clicking on Trade
Fill out all available information and click on the
 (top-right corner) to close. The information is auto-saved, and when submitted, the information is updated in real-time to your back office.
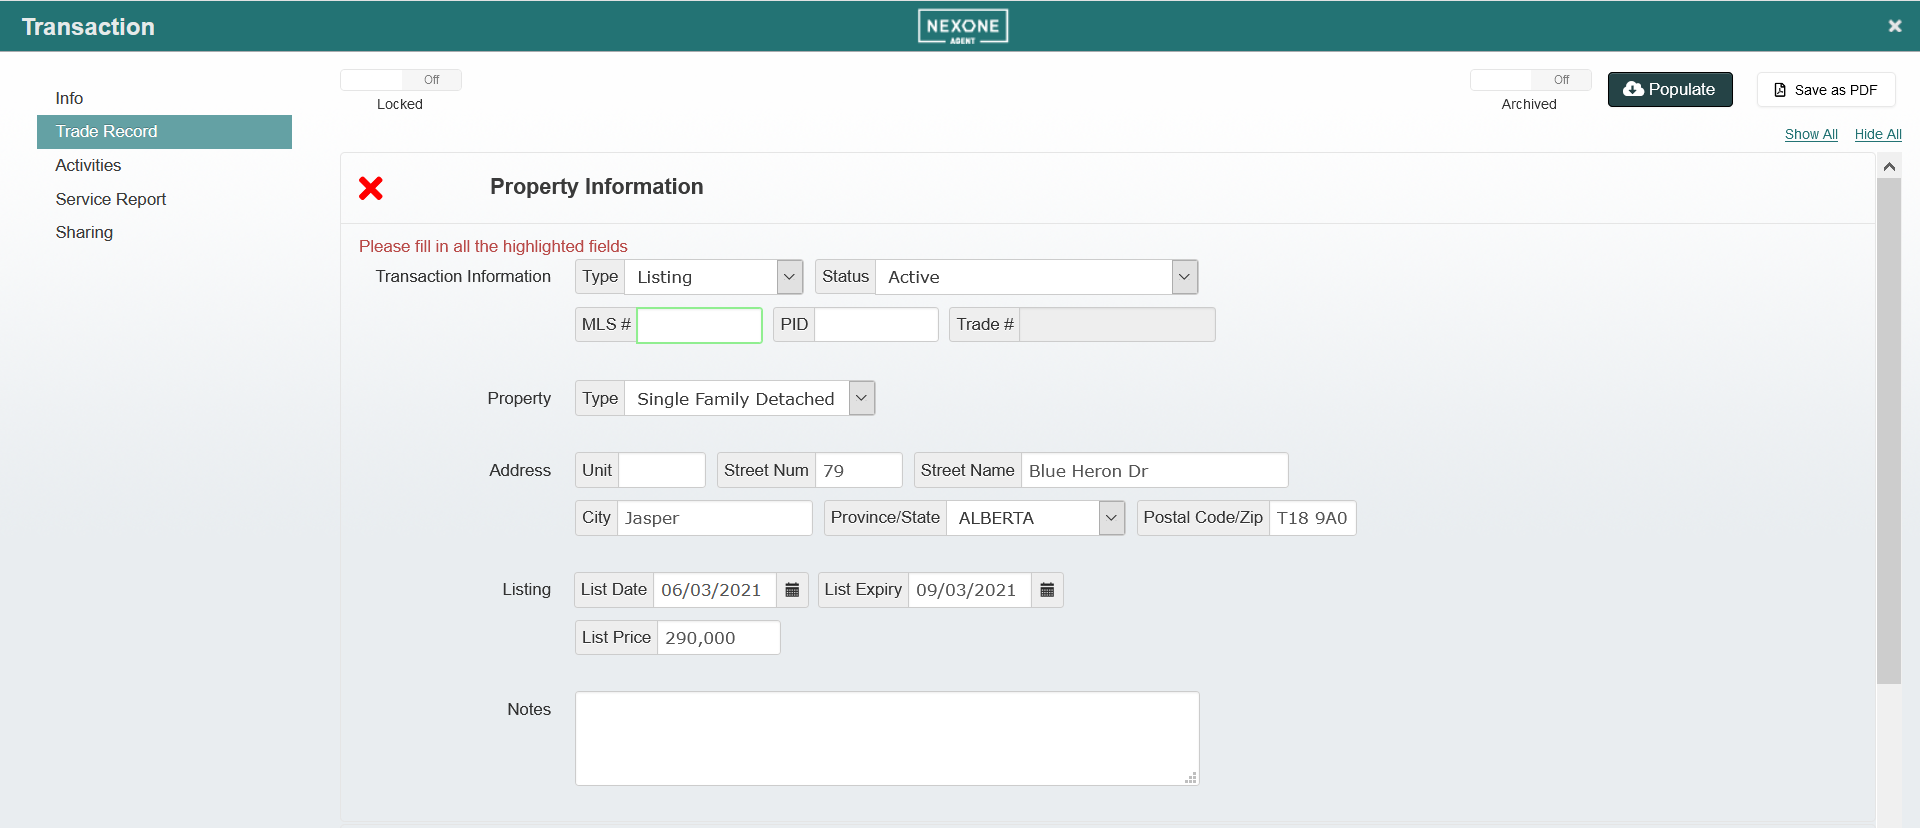
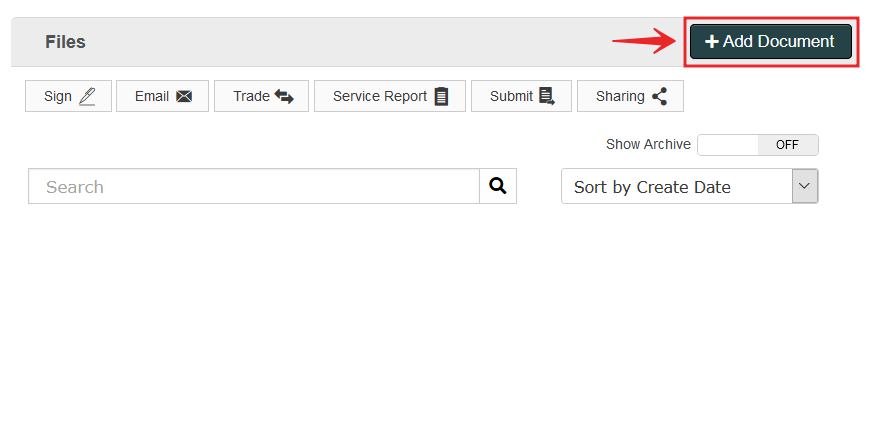
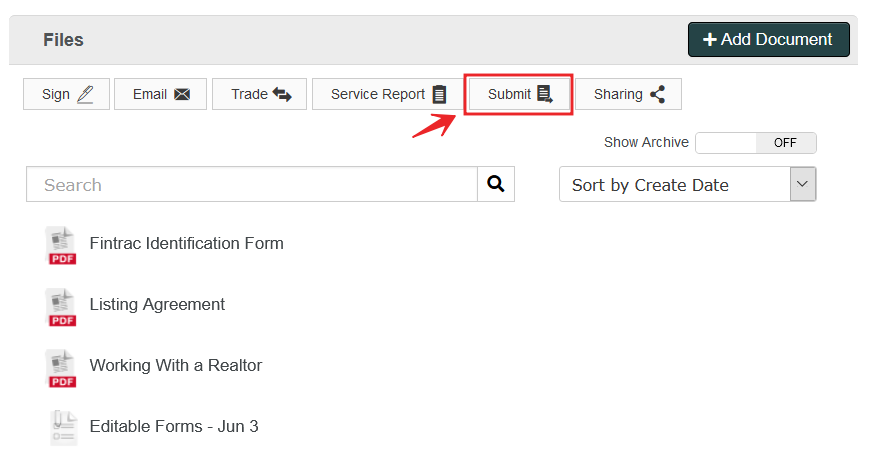
Click on Add Documents

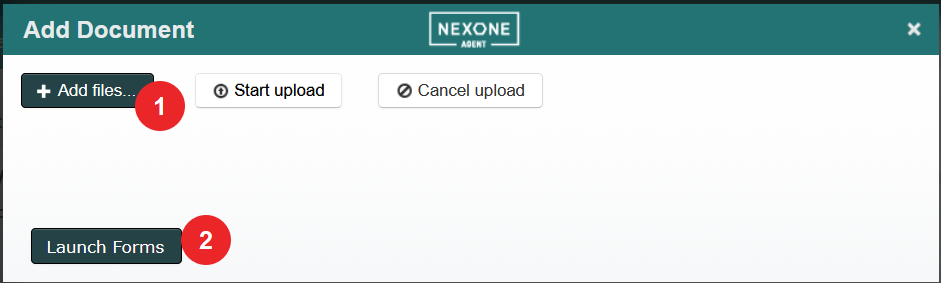
Either Add Files from your computer, or Launch Forms to access your standard Association forms. Save Document to your Transaction.

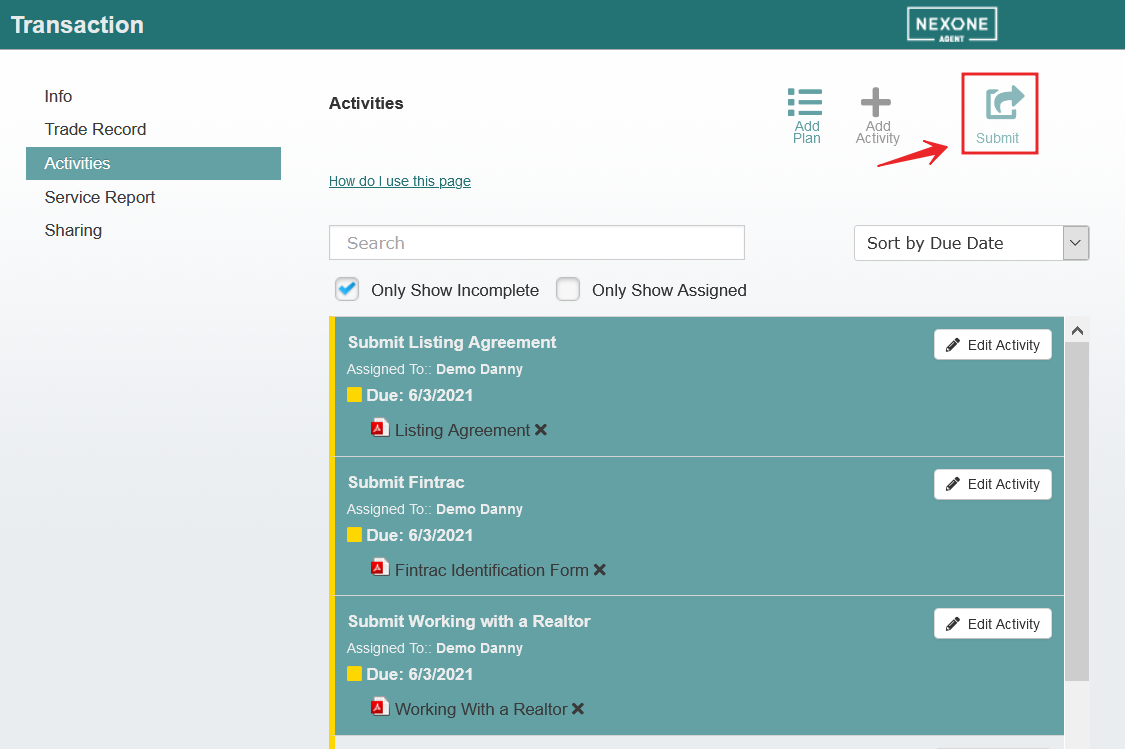
In the Document section, click on Submit

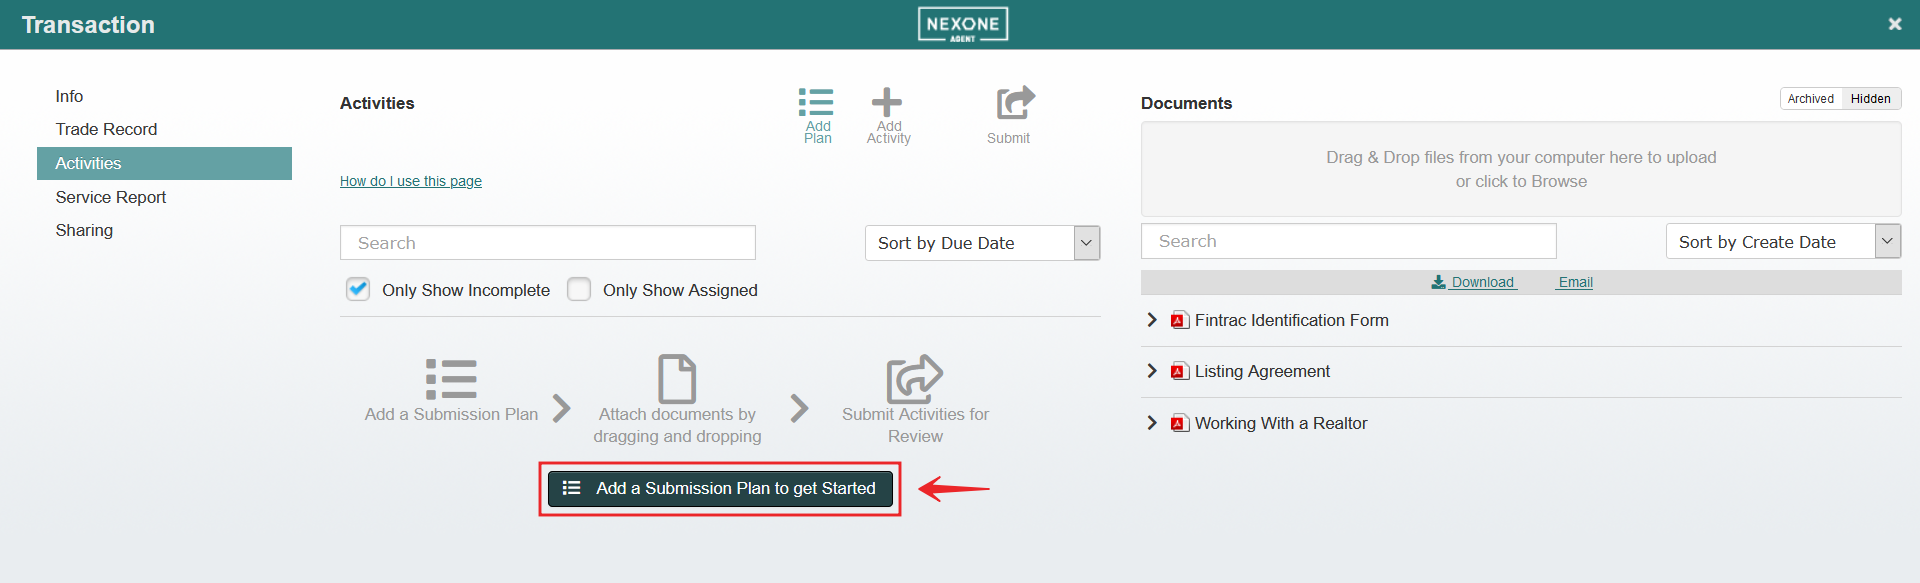
In the Activities section click on Add Plan or Add a Submission Plan to Get Started
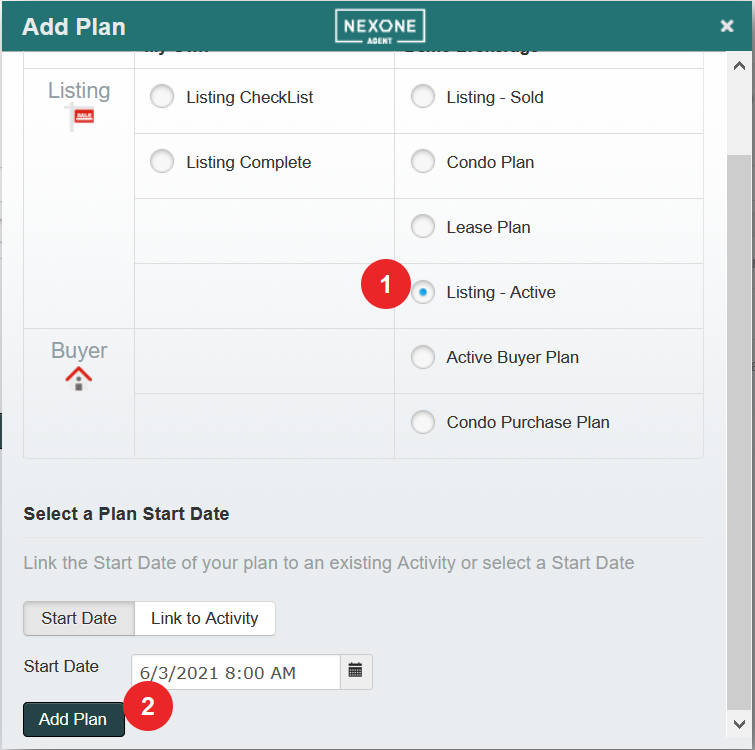
Select the Activity Plan that fits your transaction and Add Plan. Connect with your brokerage as to the specific plan to use.

Drag and drop the documents to the corresponding activity.
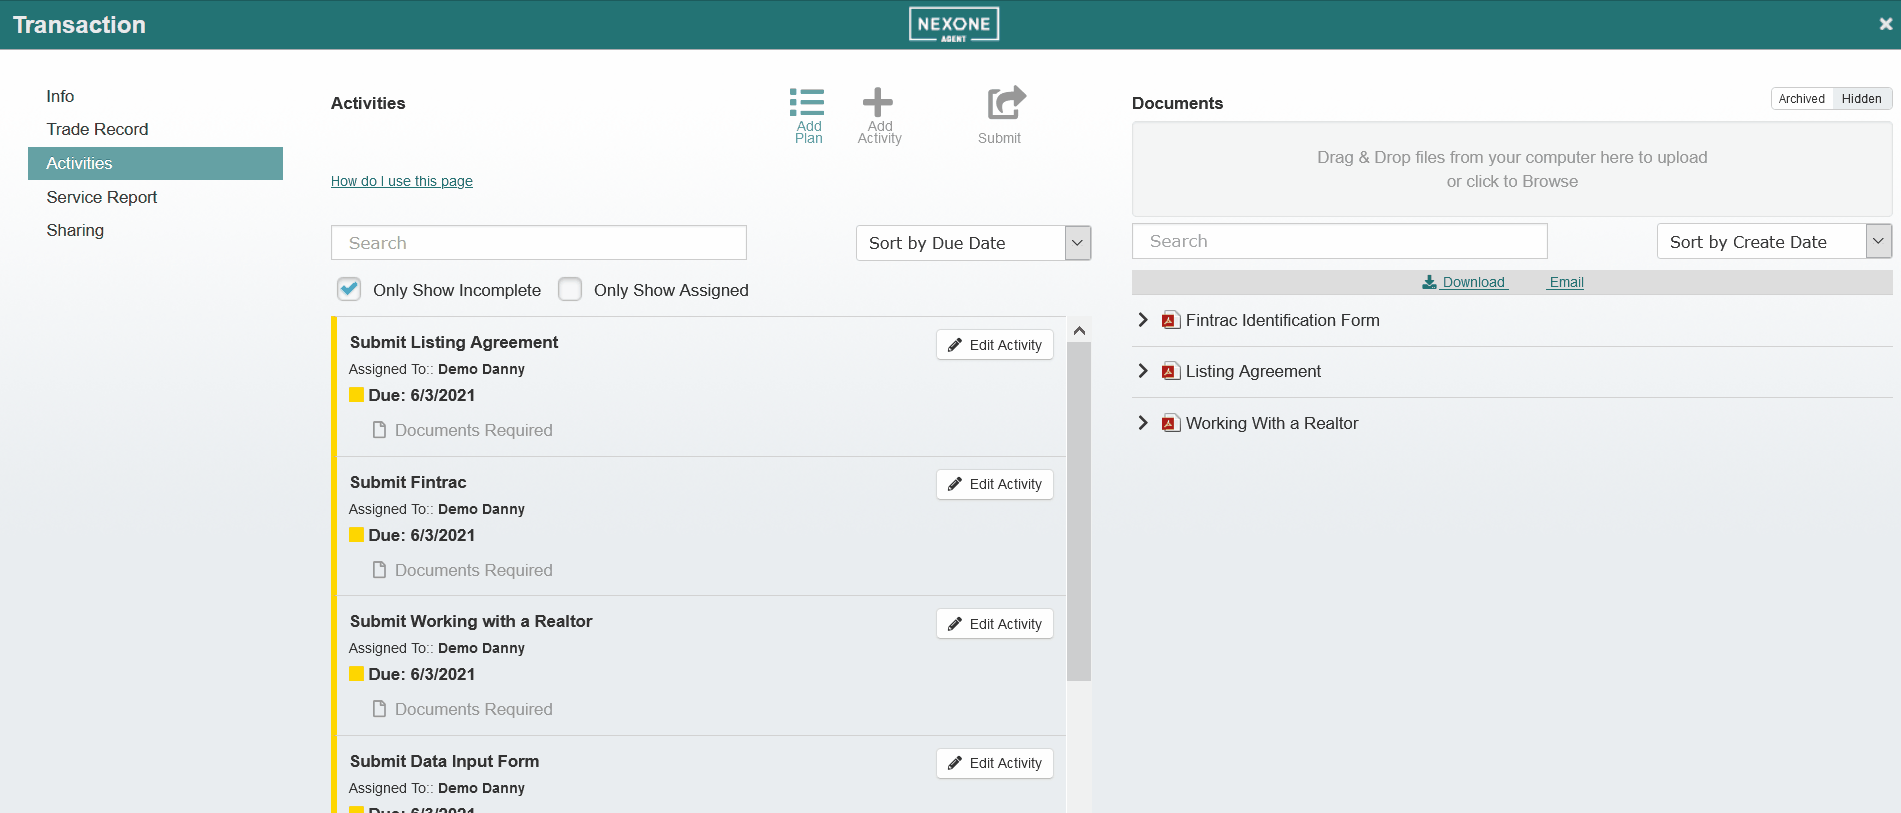

Click Submit

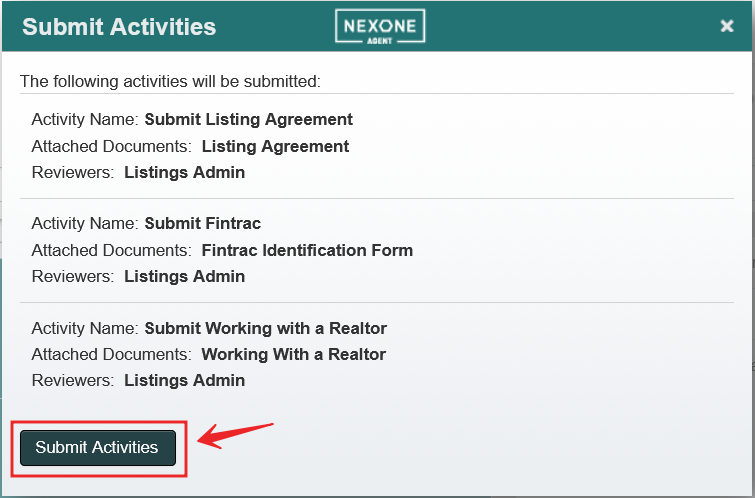
Review the activities and click Submit Activities
...