Upload/Hide Documents
Note:
Whether you are in a Transaction, Listing or Client's File, the process of Adding/Hiding documents remains the same. In this case we'll be using a Transaction as a demonstration.
Adding Documents
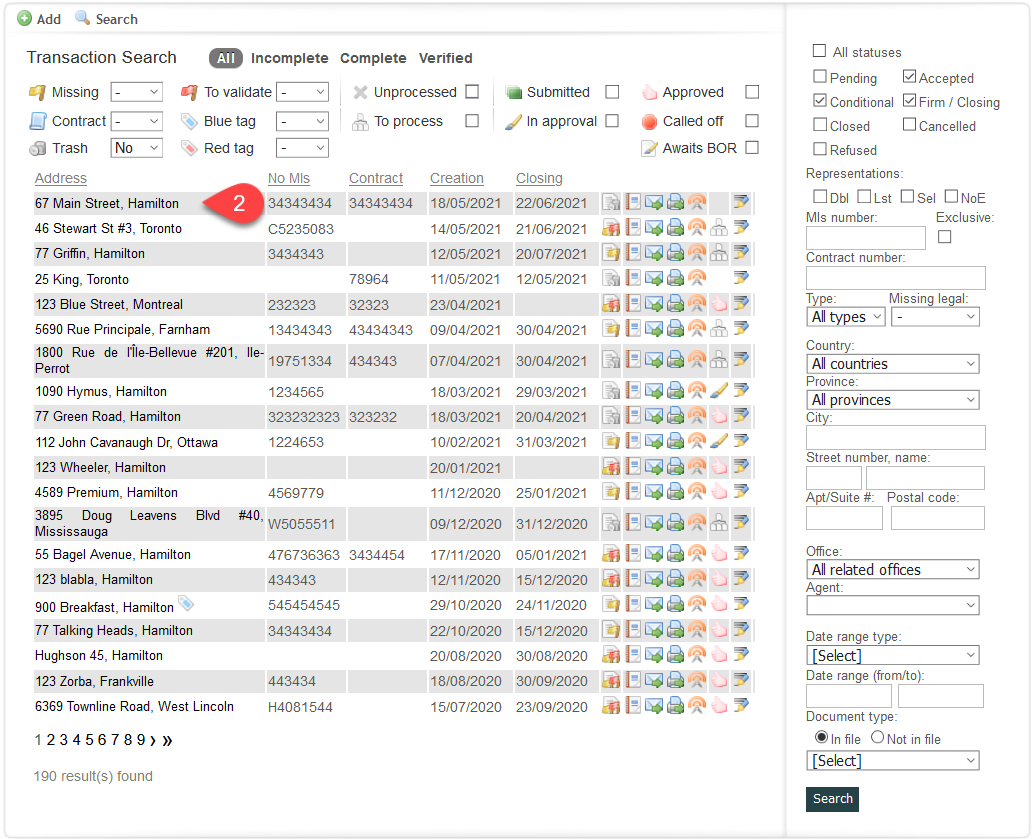
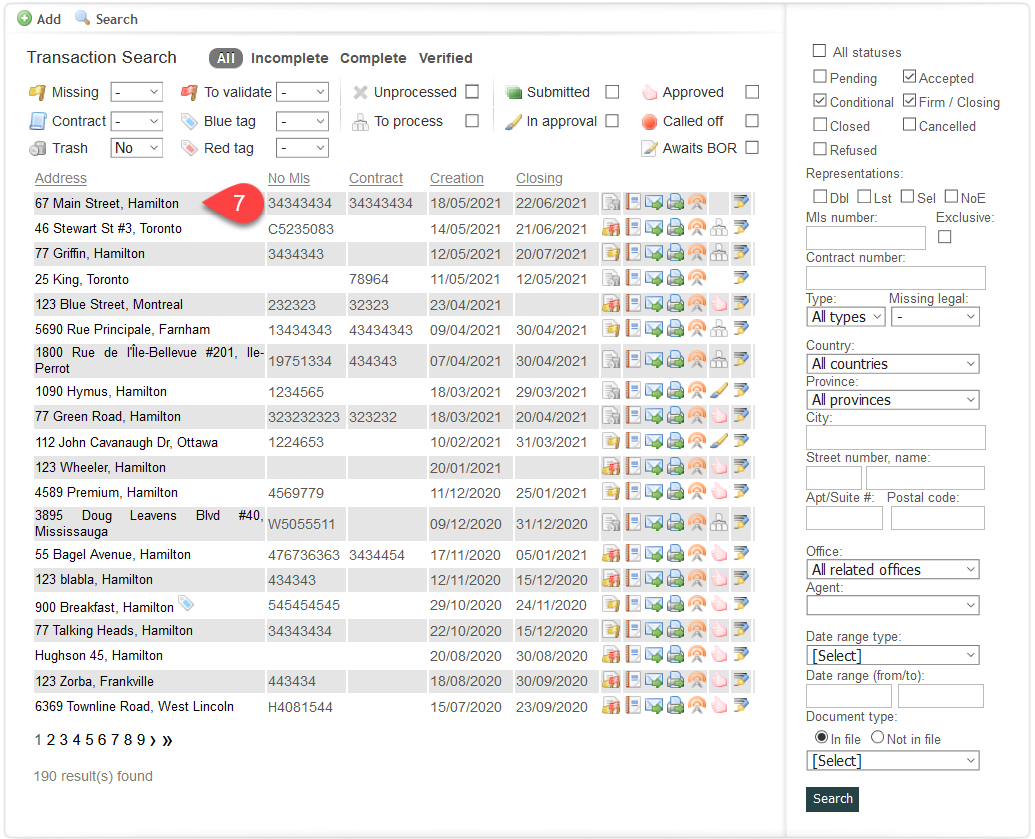
1. Click on the Transaction tab
2. Select your Transaction address
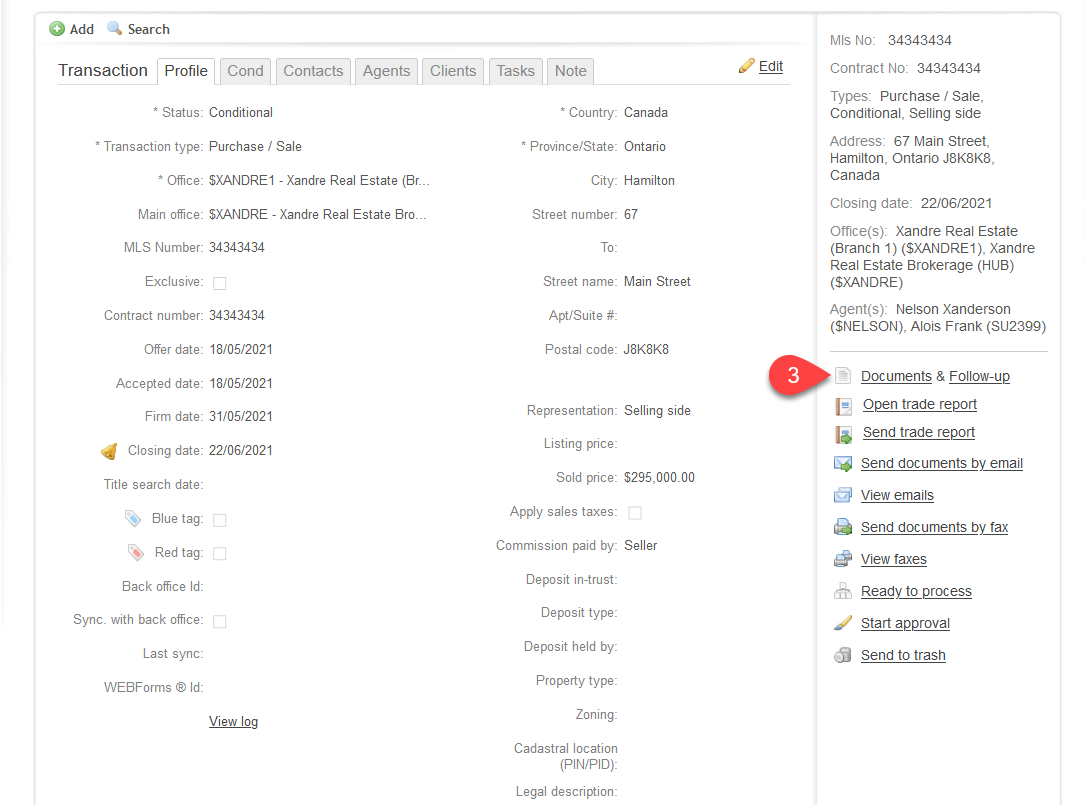
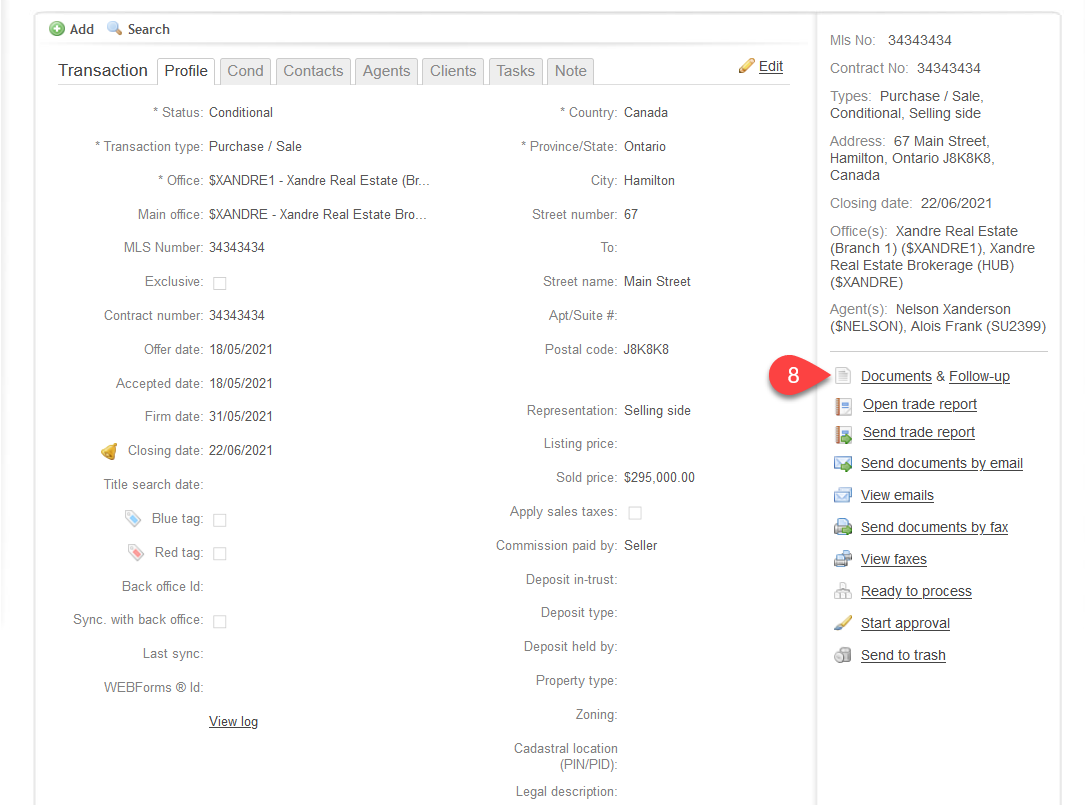
3. Click on Documents on your right hand side
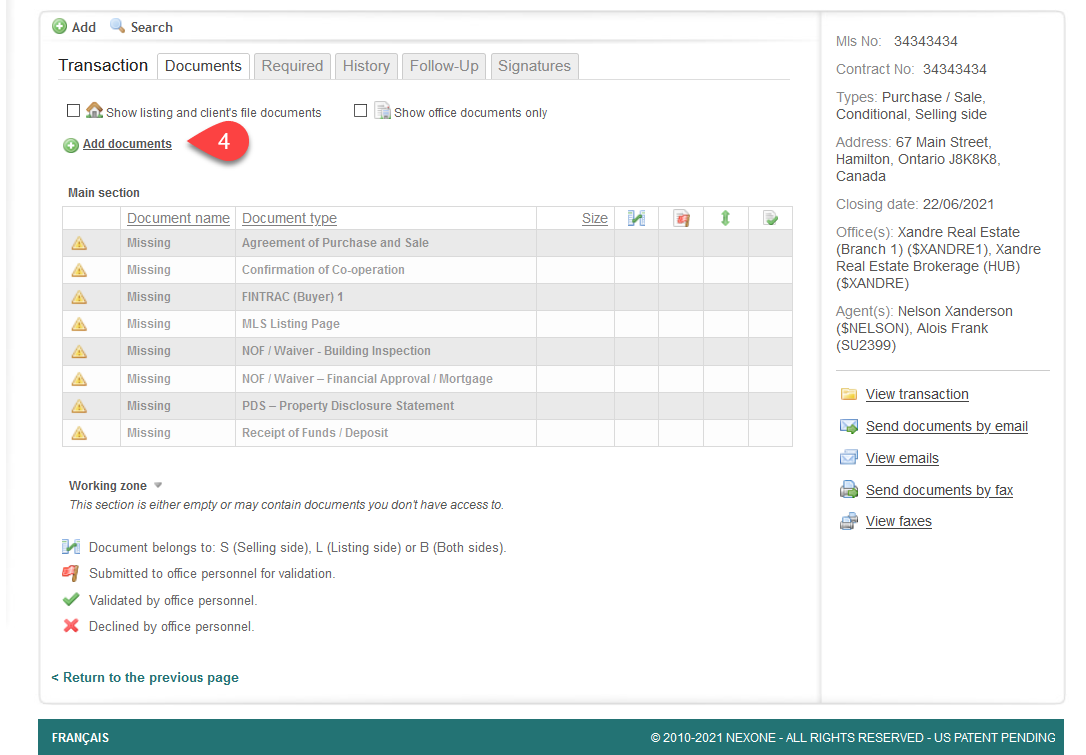
4. You will find the list of Required Documents set up by your office. Click on the Add documents button
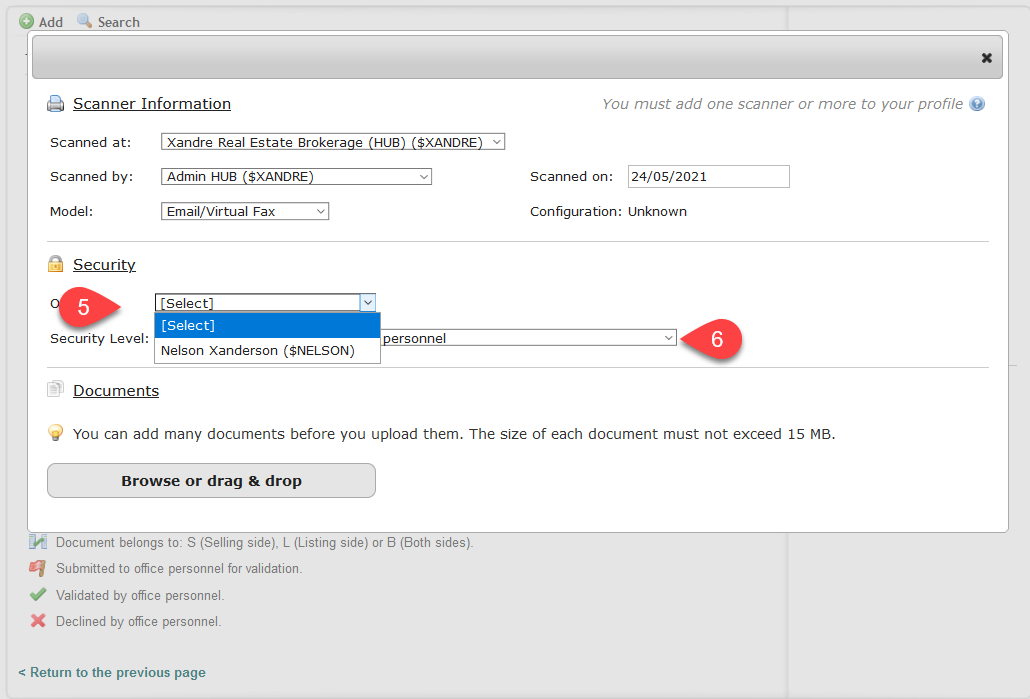
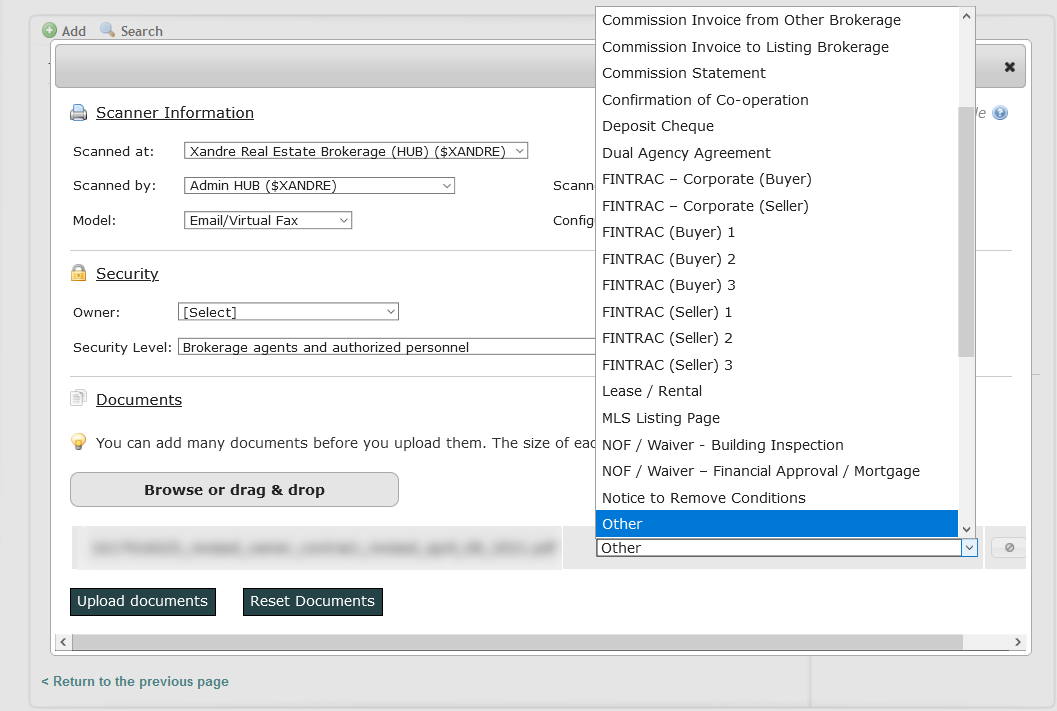
5. Before uploading your documents, make sure to fill in the required fields: Scanned at; Scanned by; Model & Security Level
Info:
There are 3 Security Levels:
- Authorized Agent Only: Only the authorized Agent has access to the file you are about to add.
- Authorized Agent and Office Personnel: The authorized Agent and the Office personnel have access to the file you are about to add.
- Brokerage Agents and Authorized Personnel: The Brokerage Agents and the authorized personnel have access to the file you are about to add.
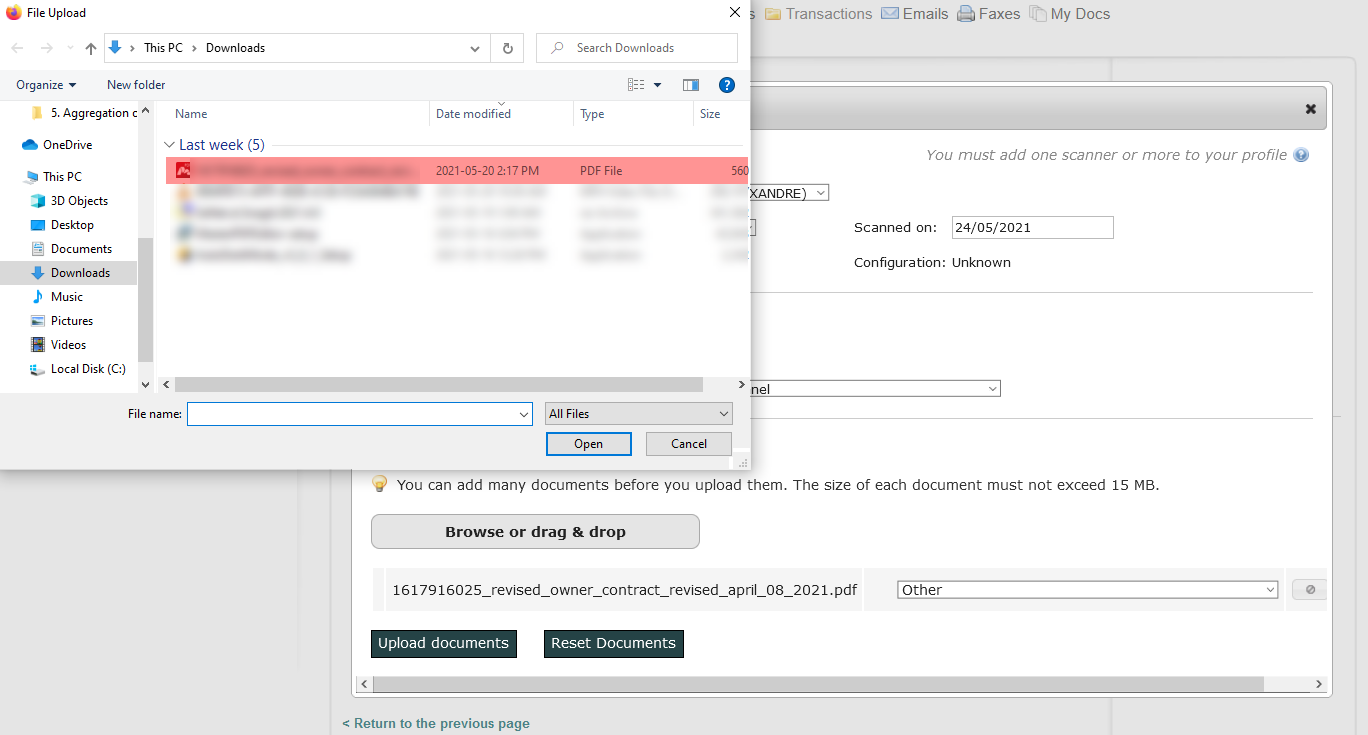
6. There is 2 ways to upload your documents: Browse or Drag & Drop
- If you click Browse, you will be able to search for your documents within your computer's files
7. After uploading, you have to Set Up the Document Type for each of your uploaded documents, then click Upload Documents
Warning:
If you do not set or if you set the wrong document type, you may not be able to find your document, depending on the rules set by your office beforehand.
Hiding Documents
Info:
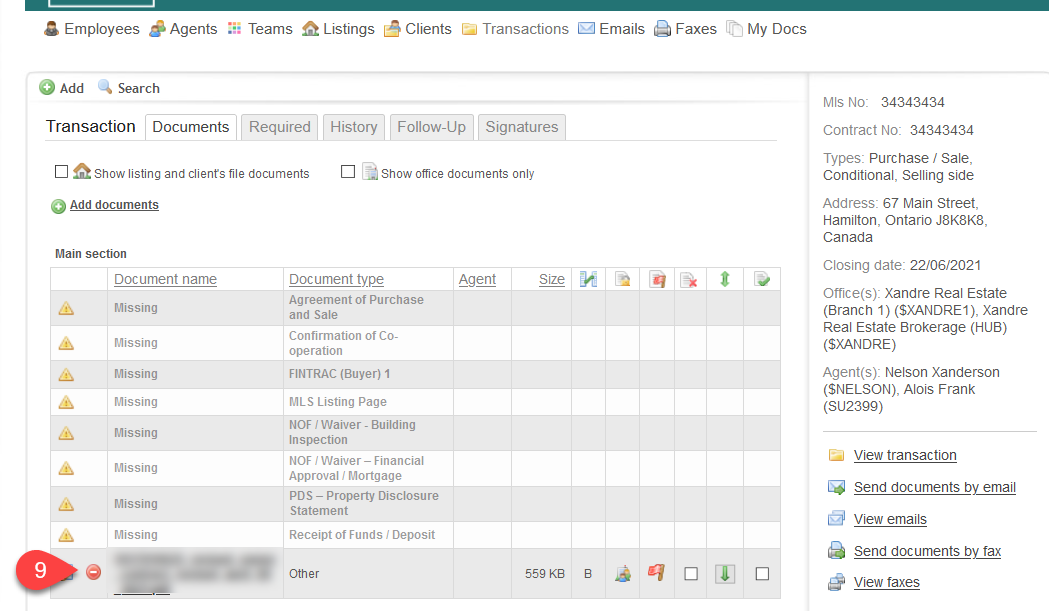
It is not possible to delete a document completely in NexOne, you can only Hide it.
1. Click on the Transaction tab
2. Select your Transaction address
3. Click on Documents on your right hand side
4. Click on the Red Circle Icon in order to Hide your Document
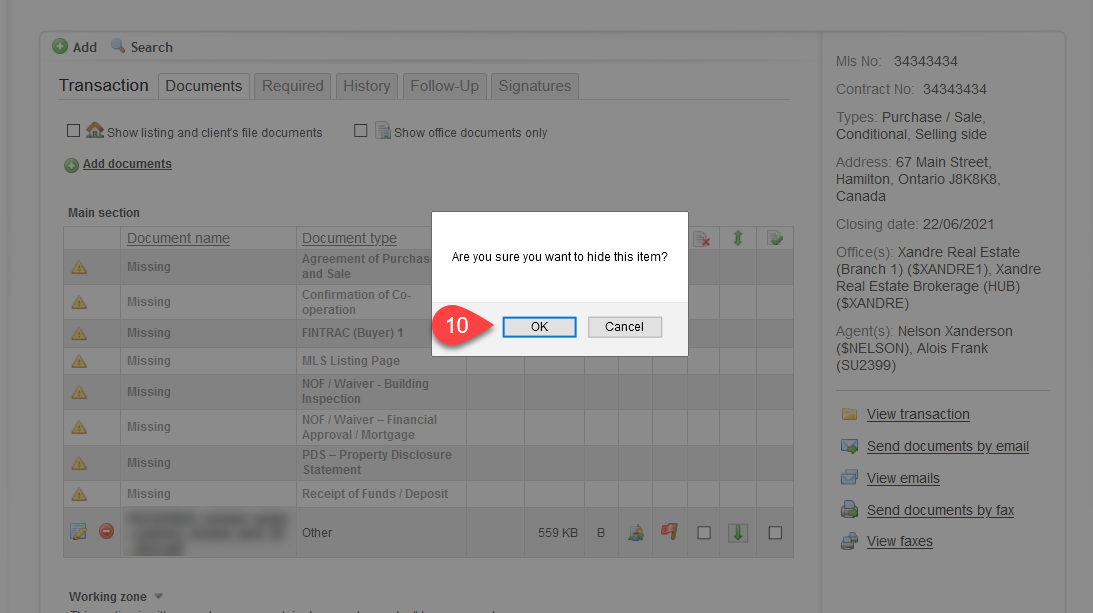
- Confirm by clicking OK
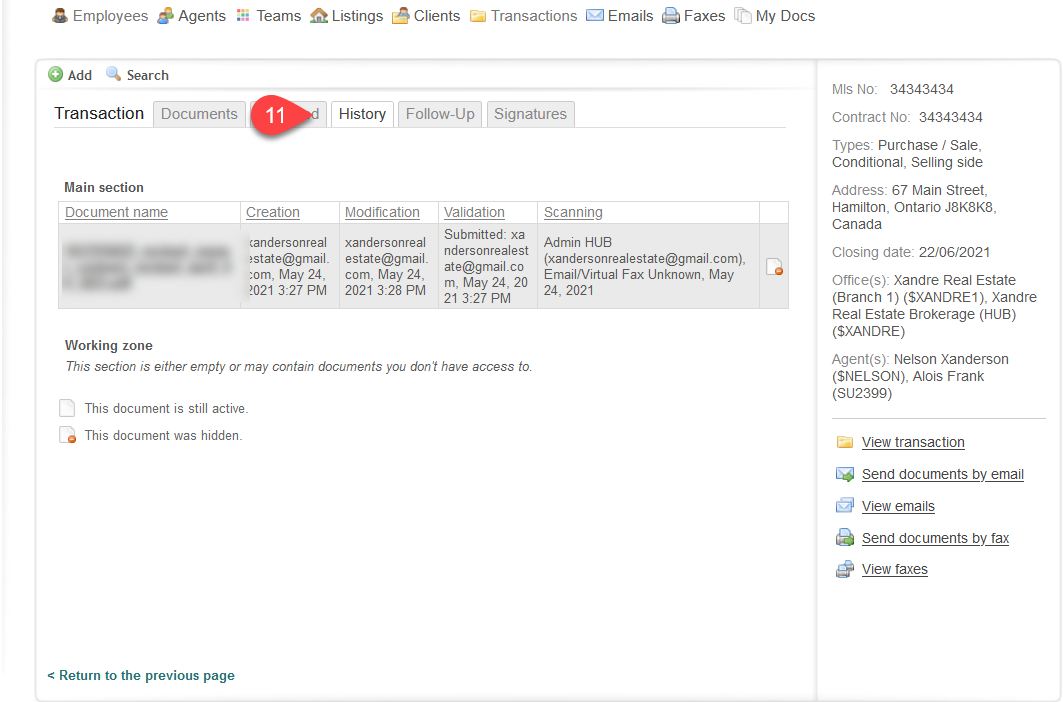
5. You will find your Hidden documents under the History tab
Tip:
In order to restore your document after having hidden it, you only need to go to the History tab, download your documents (on your computer) then re-upload it to NexOne.

