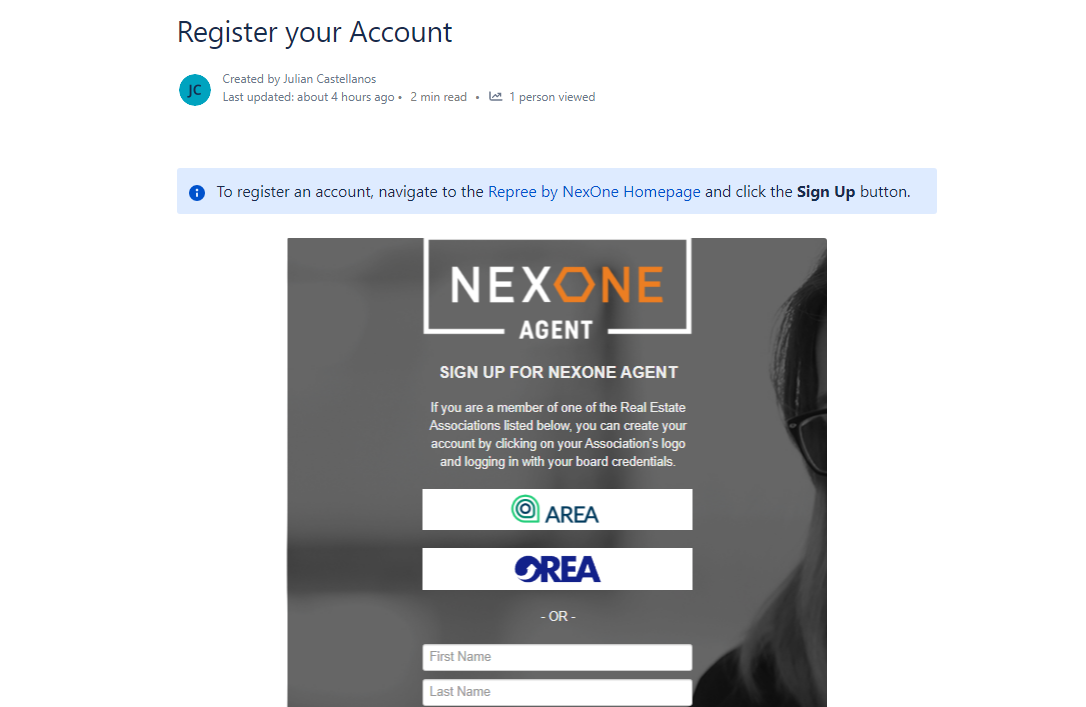
Sign up
To register an account, navigate to the Repree by NexOne Homepage and click the Sign Up button.
You can access a full article on how to select your signer in the following link: Register your Account
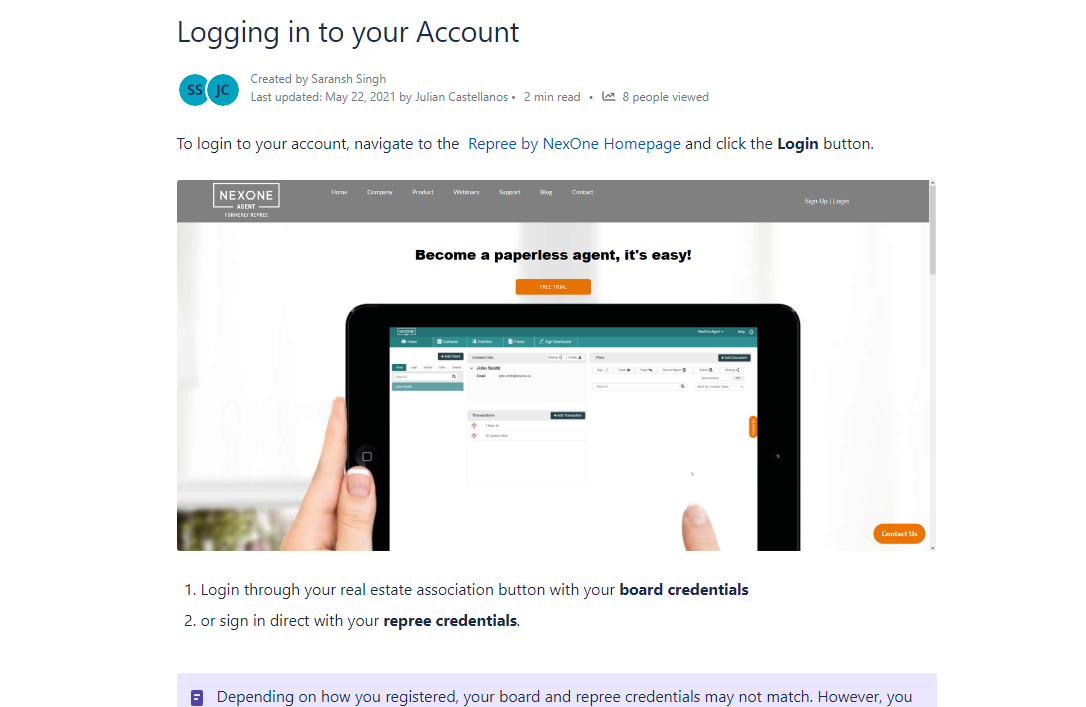
Login + options
To login to your account, navigate to the Repree by NexOne Homepage and click the Login button.
You can access a full article on how to select your signer in the following link: Logging in to your Account
Calendar section
Your repree calendar allows you to add real estate specific events connected to your clients and transactions as well as creating email reminders about those events.
You can access a full article on how to select your signer in the following link: Real Estate Specific Calendar

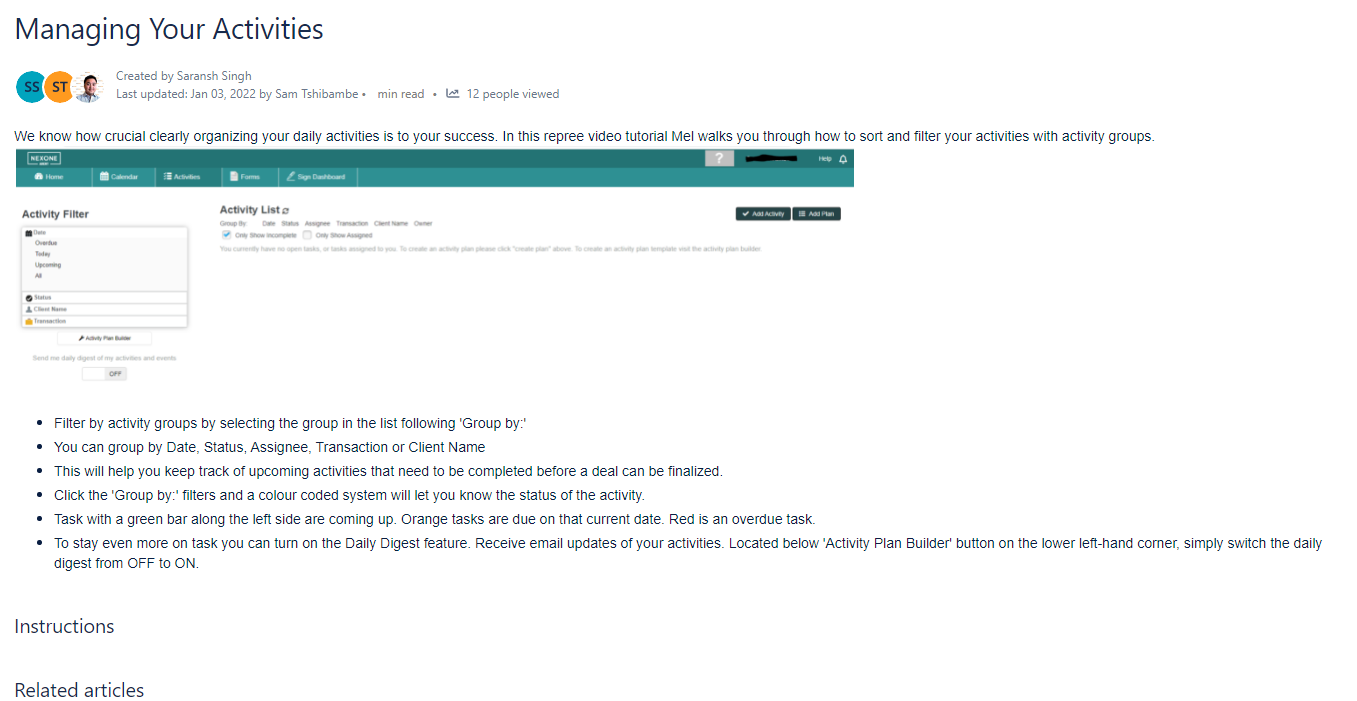
Activities section
We know how crucial clearly organizing your daily activities is to your success.
You can access a full article on how to select your signer in the following link: Managing Your Activities
Forms section
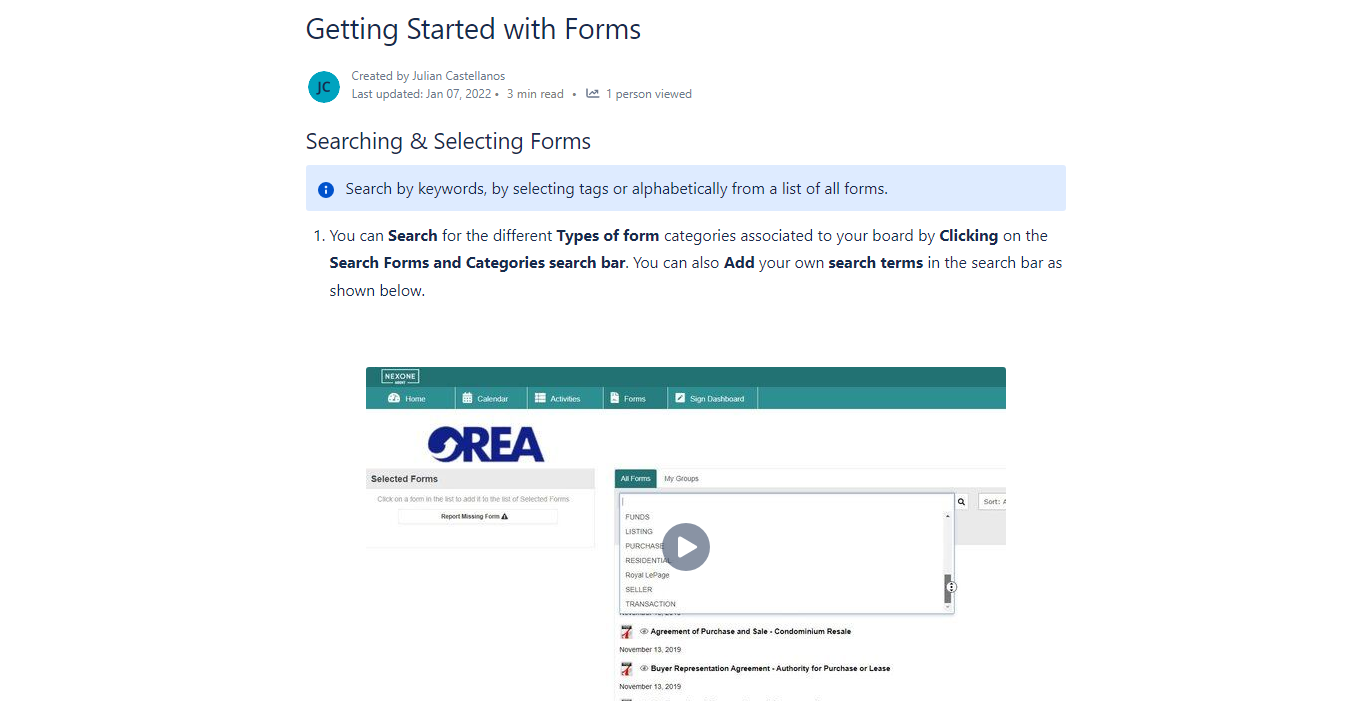
Search by keywords, by selecting tags or alphabetically from a list of all forms.
You can access a full article on how to select your signer in the following link: Getting Started with Forms
Profile + help
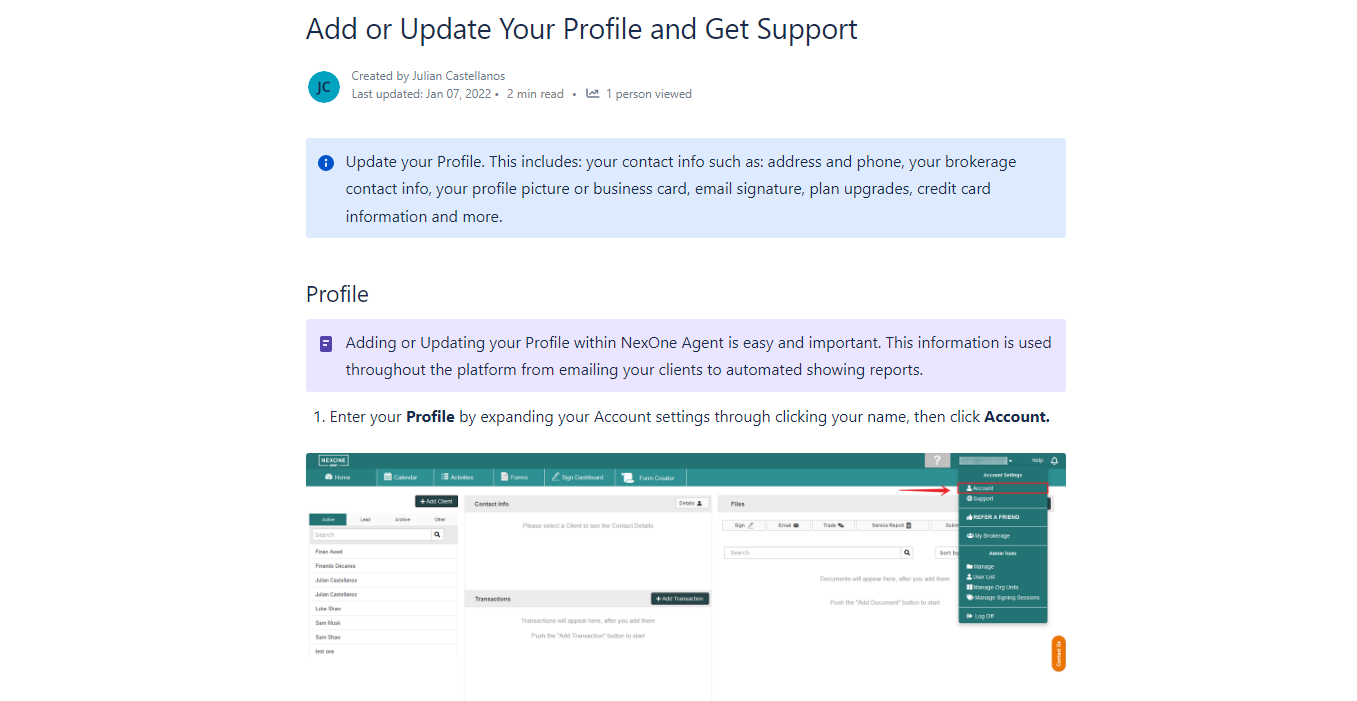
Update your Profile. This includes: your contact info such as: address and phone, your brokerage contact info, your profile picture or business card, email signature, plan upgrades, credit card information and more.
You can access a full article on how to select your signer in the following link: Add or Update Your Profile and Get Support
Add client
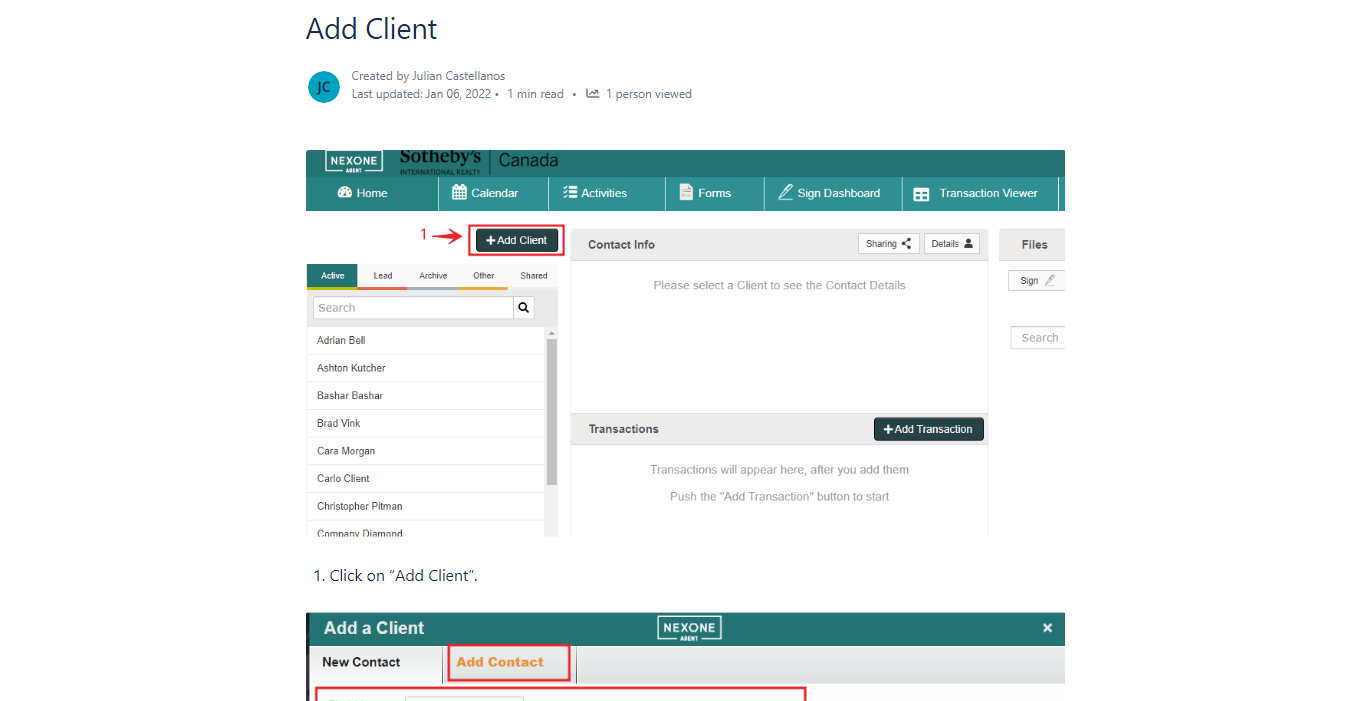
Include contact information and add many clients as you wish.
You can access a full article on how to select your signer in the following link: Add Client
Add transaction
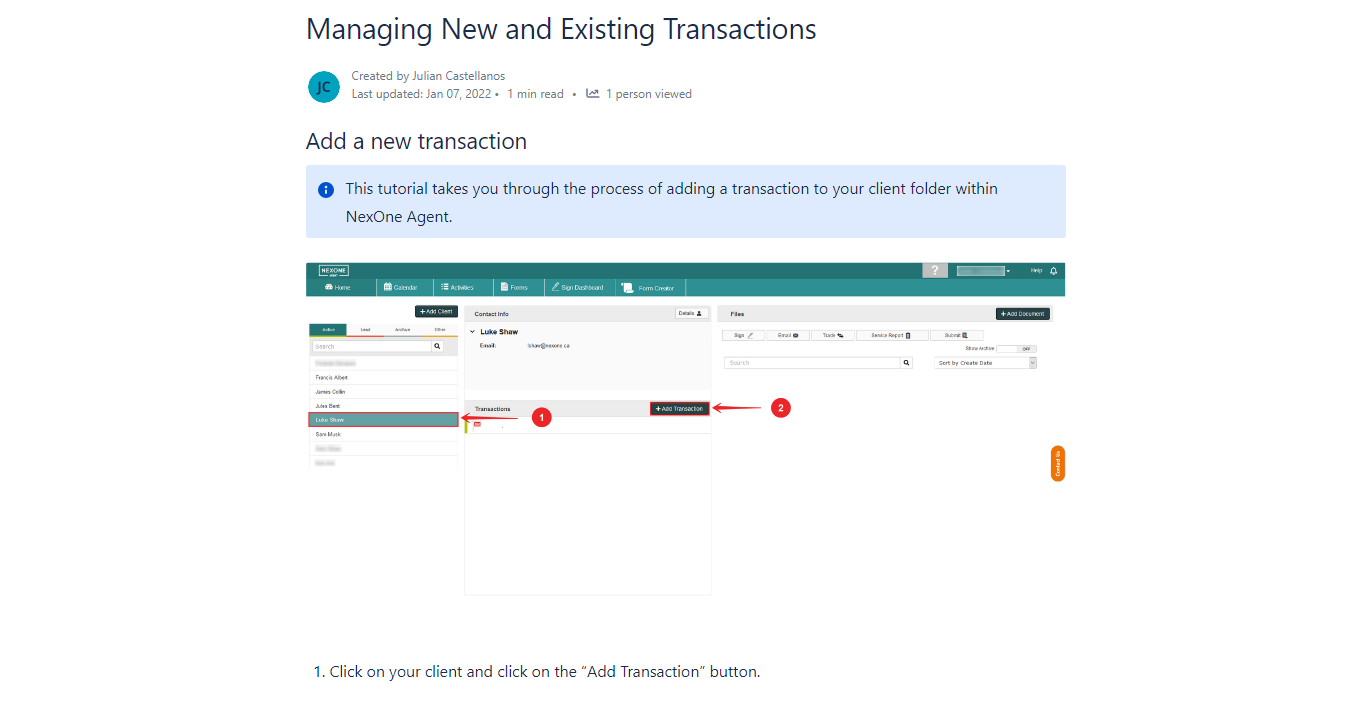
This tutorial takes you through the process of adding a transaction to your client folder within NexOne Agent.
You can access a full article on how to select your signer in the following link: Managing New and Existing Transactions
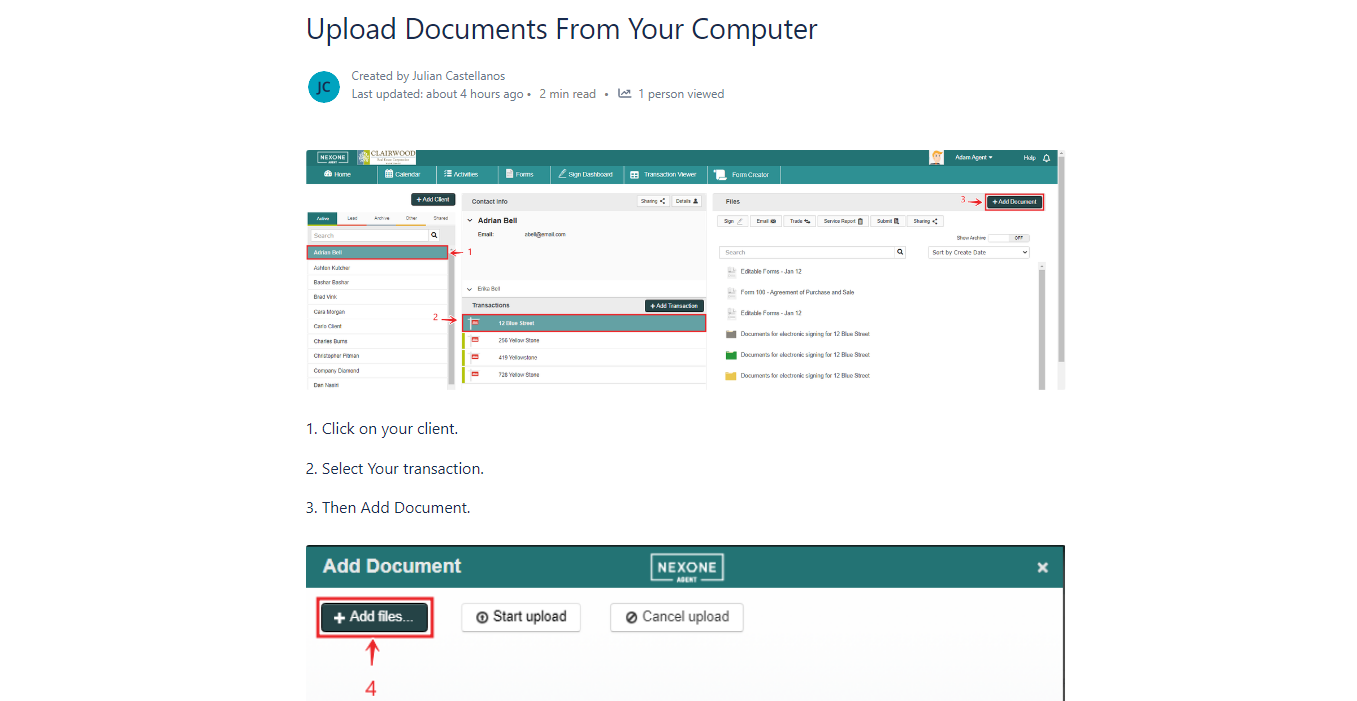
Add documents
Upload any files you've chosen from your computer.
You can access a full article on how to select your signer in the following link: Upload Documents From Your Computer
NexOne Sign (Select signers and documents, add/edit/remove tags)
Select your signers, choose their routing orders, choose their signer type, add their profession, require a password to begin the signing process and more with Ratify by repree!
You can access a full article on how to select your signer in the following link: Getting Started with NexOne Sign

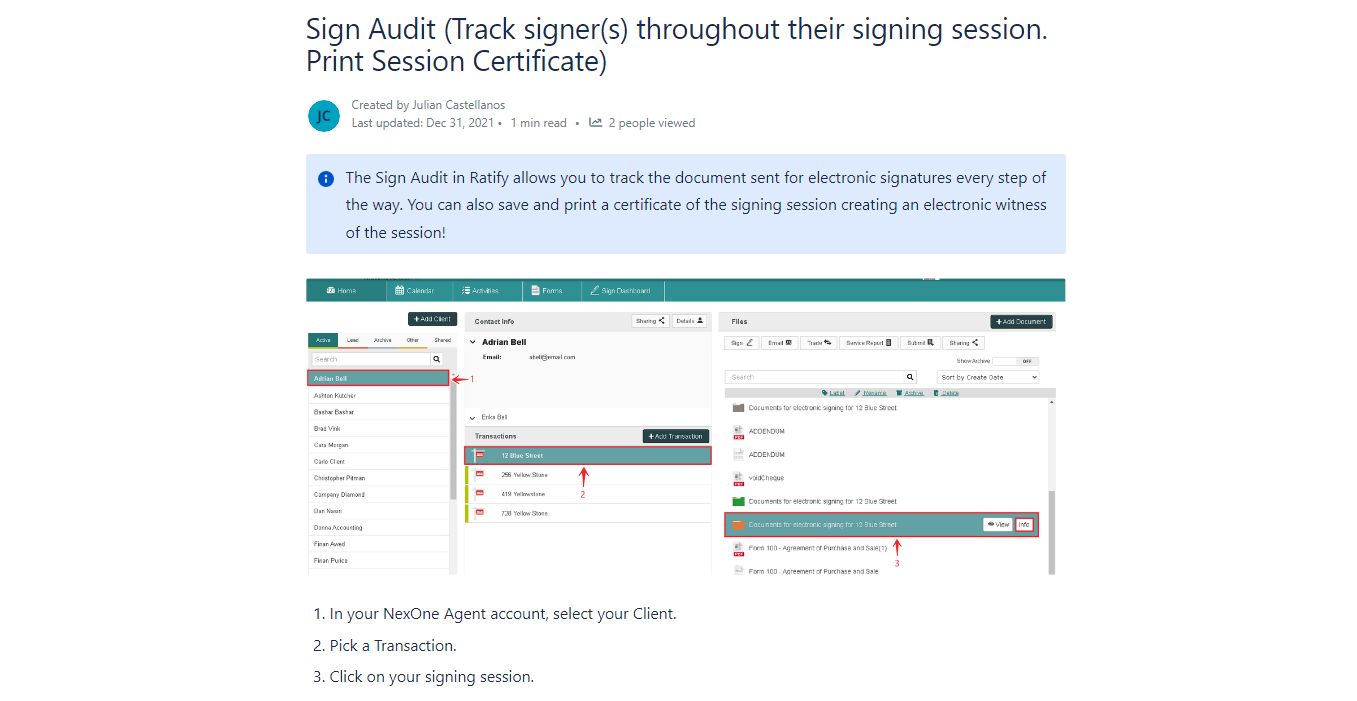
Sign Audit (with session certificate)
The Sign Audit in Ratify allows you to track the document sent for electronic signatures every step of the way. You can also save and print a certificate of the signing session creating an electronic witness of the session!
You can access a full article on how to select your signer in the following link: Sign Audit (Track signer(s) throughout their signing session. Print Session Certificate)
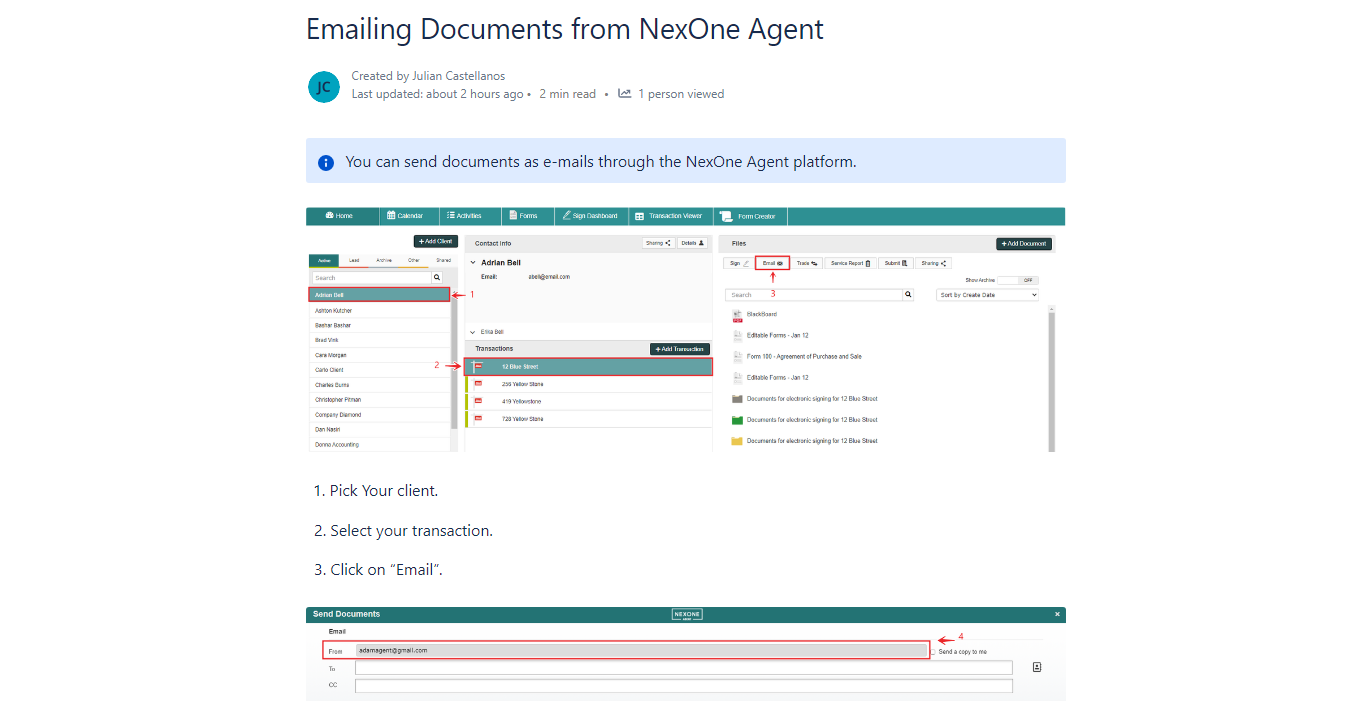
Email documents
You can send documents as e-mails through the NexOne Agent platform.
You can access a full article on how to select your signer in the following link: Emailing Documents from NexOne Agent