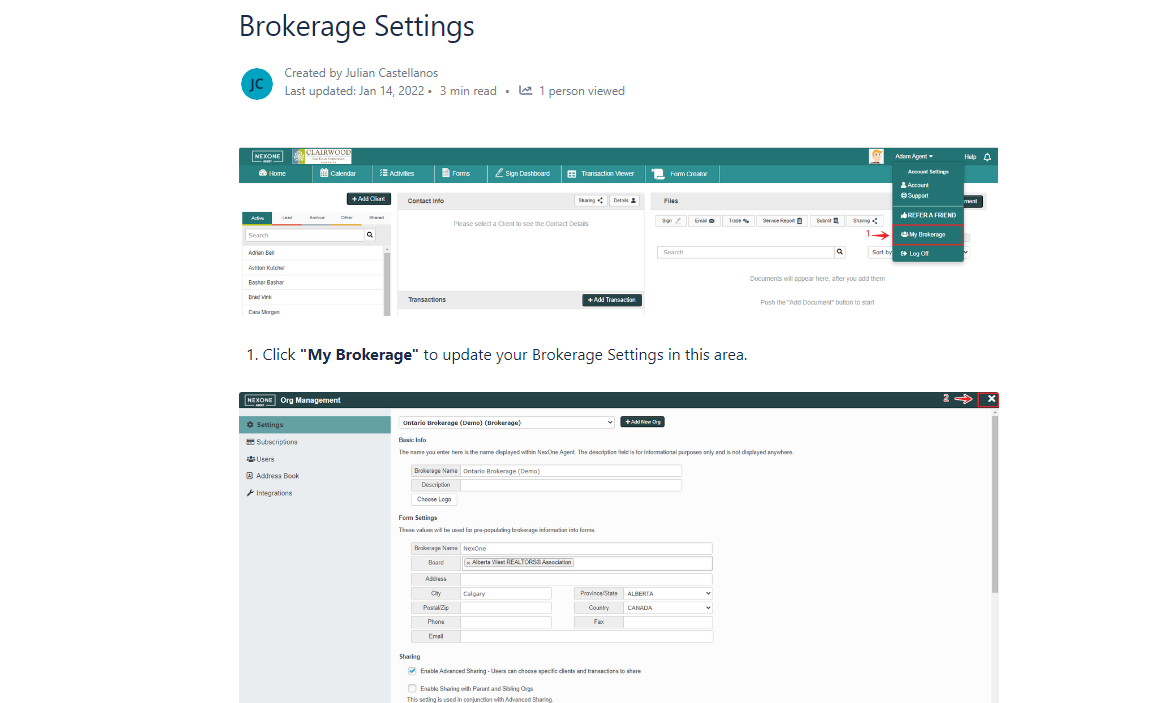
First step in successfully having your brokerage transition to paperless is for your members to embrace the mentality. Teamwork makes the dream work! Below you will find instructions on how to send out invitations to get your members up and running. |
You can access the full article in the following link: Accepting an Invitation - Registering a New account or Connect an Existing account
You can access the full article in the following link: Accepting an Invitation - Registering a New account or Connect an Existing account
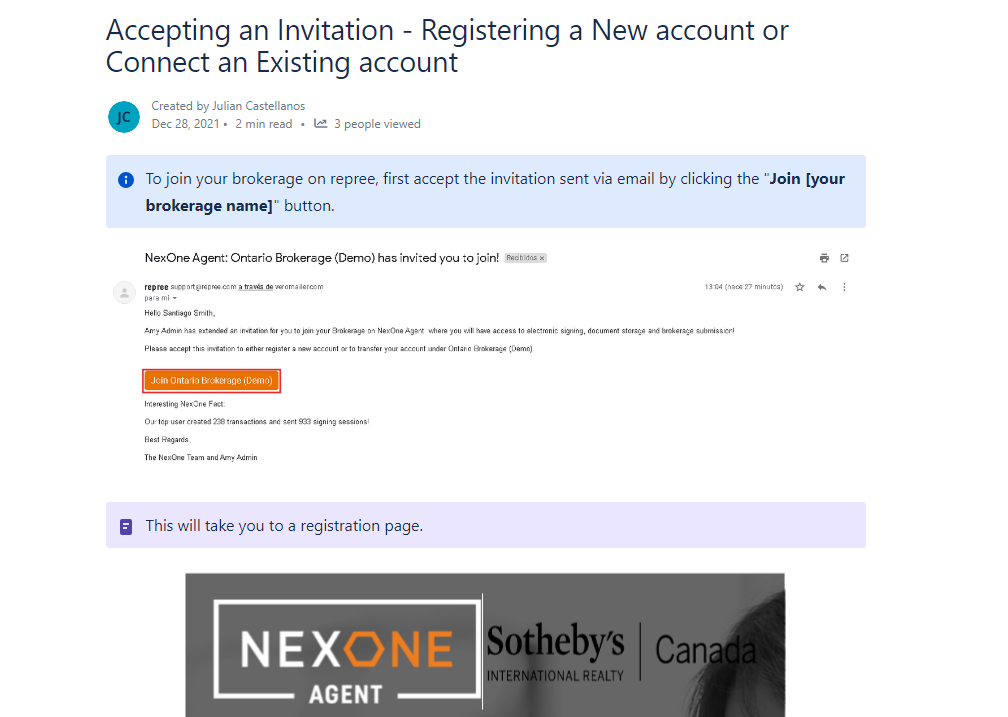
Once the invitations have been sent off, the next step is creating your brokerages submission plans. These are the plans which your agents will be using to submit their transaction documents and complete their assigned activities. |
You can access the full article in the following link: Creating an Activity Plan with the Activity Plan Builder
You can access the full article in the following link: Creating an Activity Plan with the Activity Plan Builder
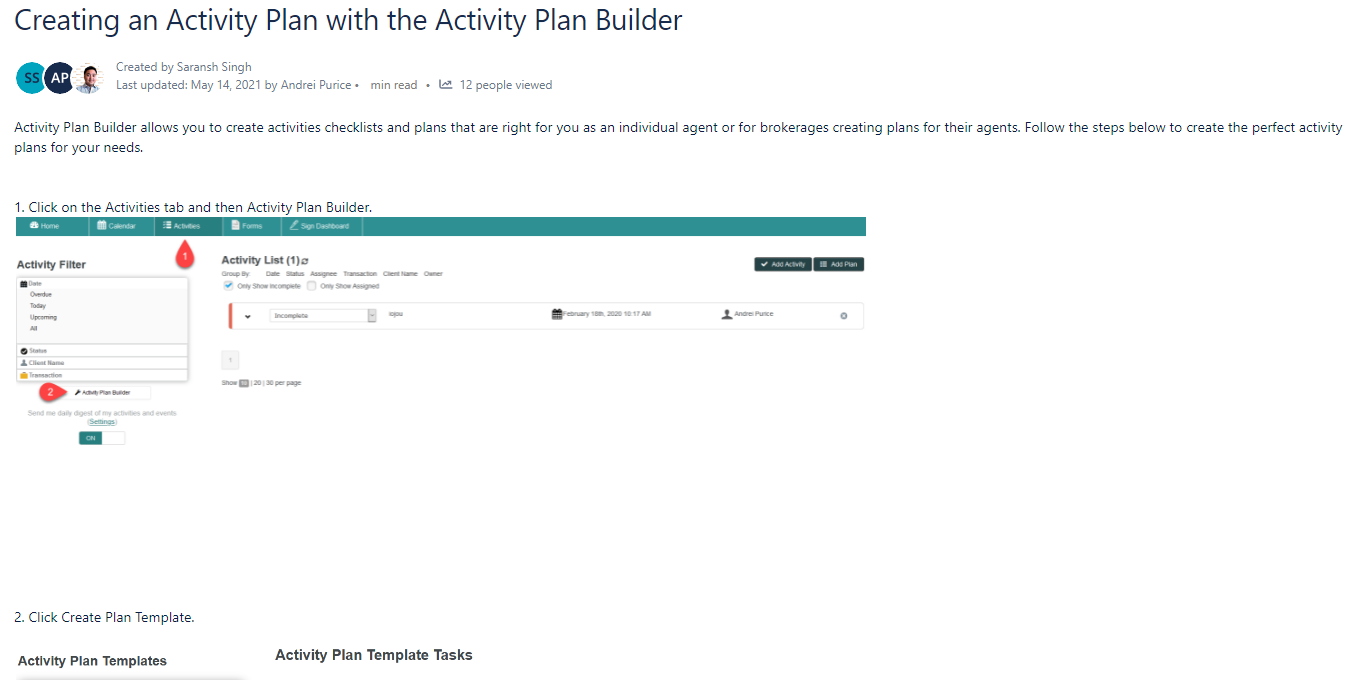
For each transaction there may be a particular set of forms that are used. To save your agents some time in searching for these forms, you can create a Form Group which can be shared with the members of your brokerage. |
You can access the full article in the following link: Form Groups - Creating & Sharing within your Organization
You can access the full article in the following link: Form Groups - Creating & Sharing within your Organization
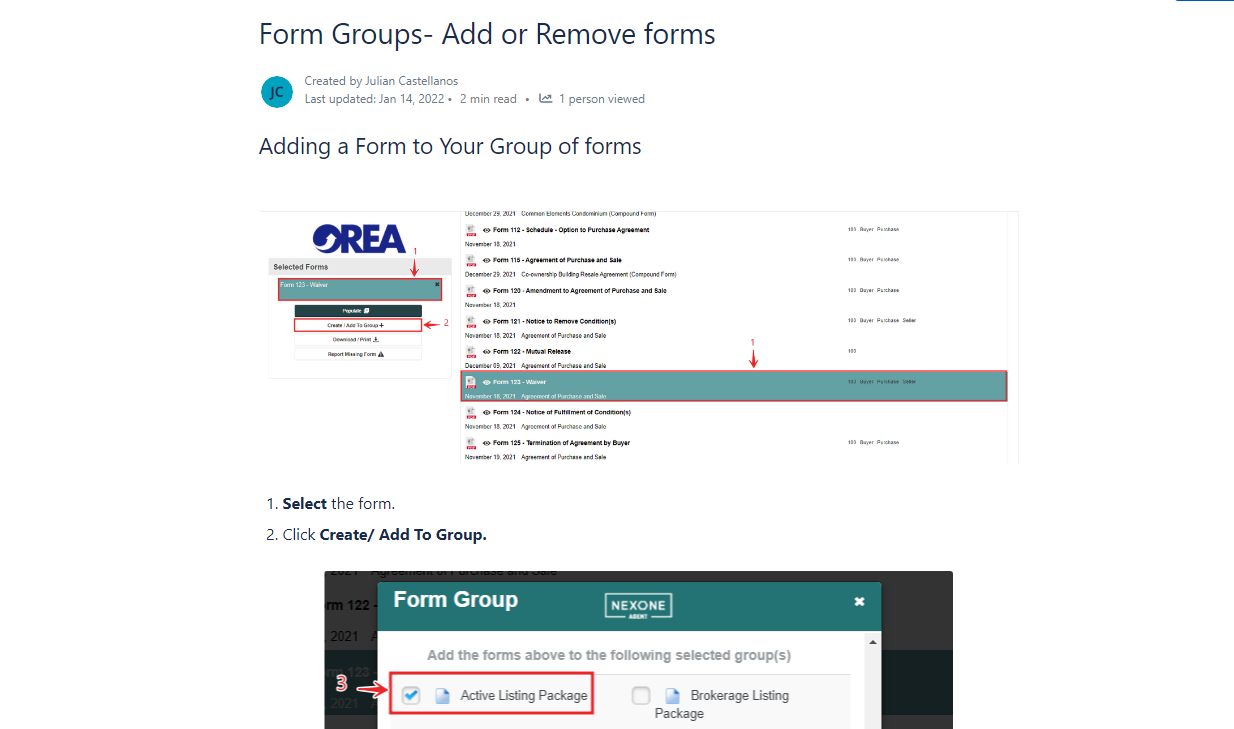
You are able to add or remove a form(s) from a Form Group if you choose. |
You can access the full article in the following link: Form Groups- Add or Remove forms
You can access the full article in the following link: Form Groups- Add or Remove forms
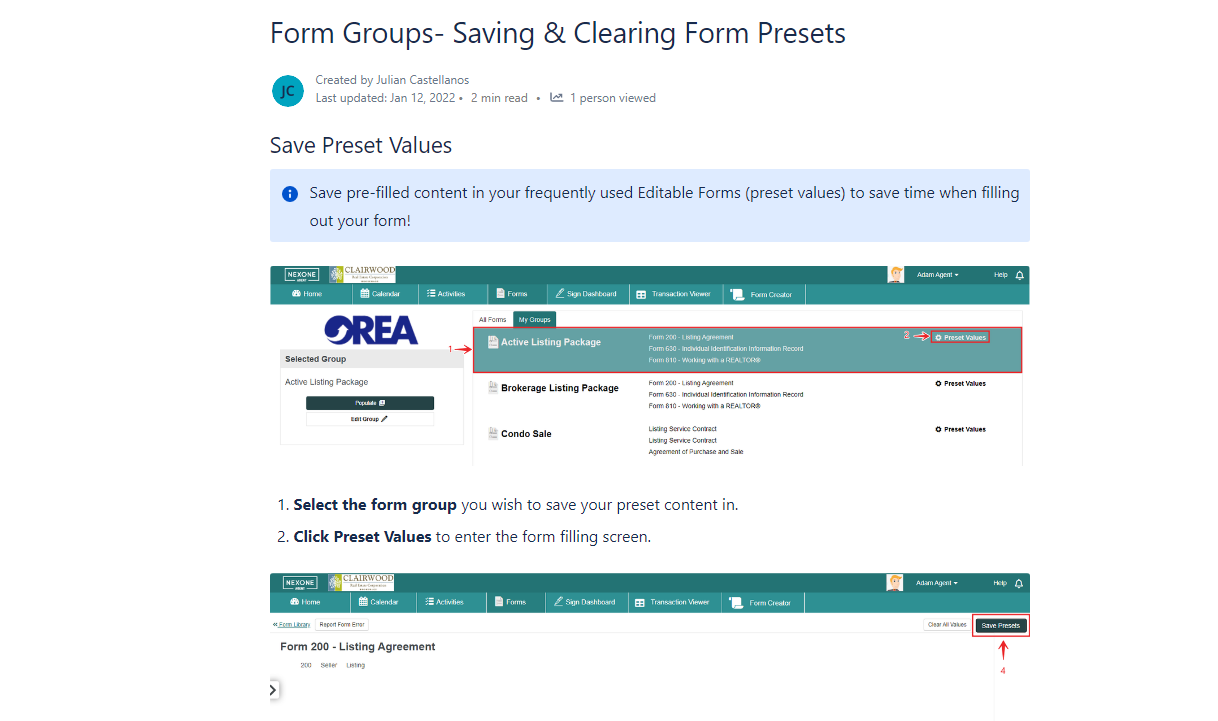
Additionally, you have the ability to set preset values for each form in your form group. |
You can access the full article in the following link: Form Groups- Saving & Clearing Form Presets
You can access the full article in the following link: Form Groups- Saving & Clearing Form Presets
This is particularly helpful when there are certain brokerage conditions or clauses that are required to be added to a form.
This is particularly helpful when there are certain brokerage conditions or clauses that are required to be added to a form.
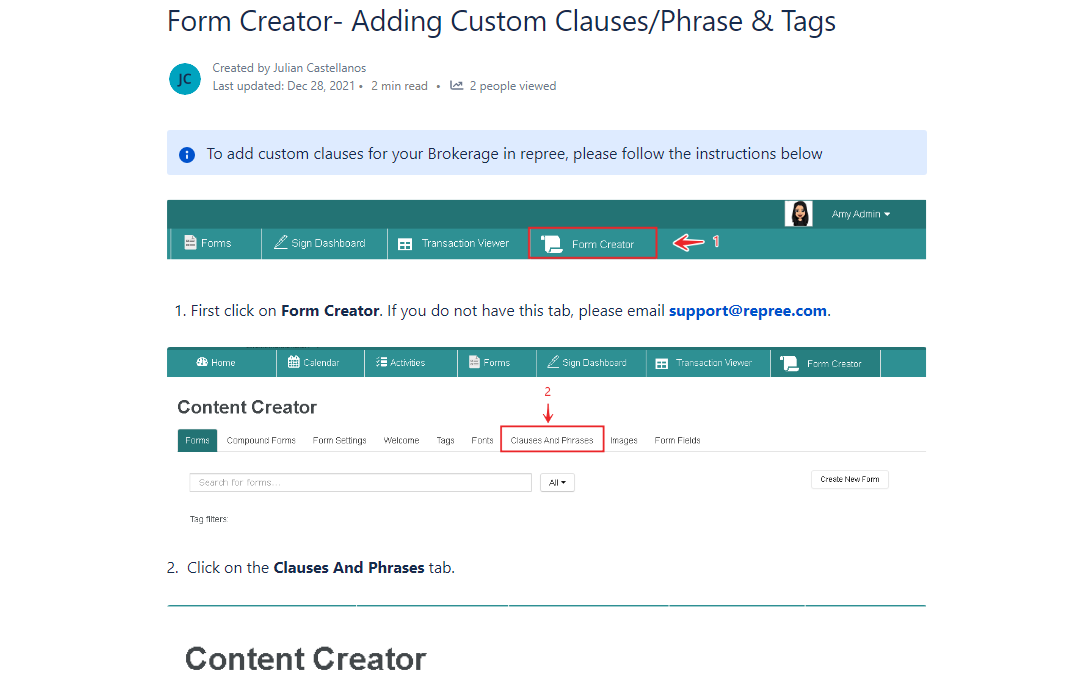
As the same reasoning behind creating your Form Groups, there may be custom clauses & phrases that your brokerage members are required to use. |
You can access the full article in the following link: Form Creator- Adding Custom Clauses/Phrase & Tags
You can access the full article in the following link: Form Creator- Adding Custom Clauses/Phrase & Tags
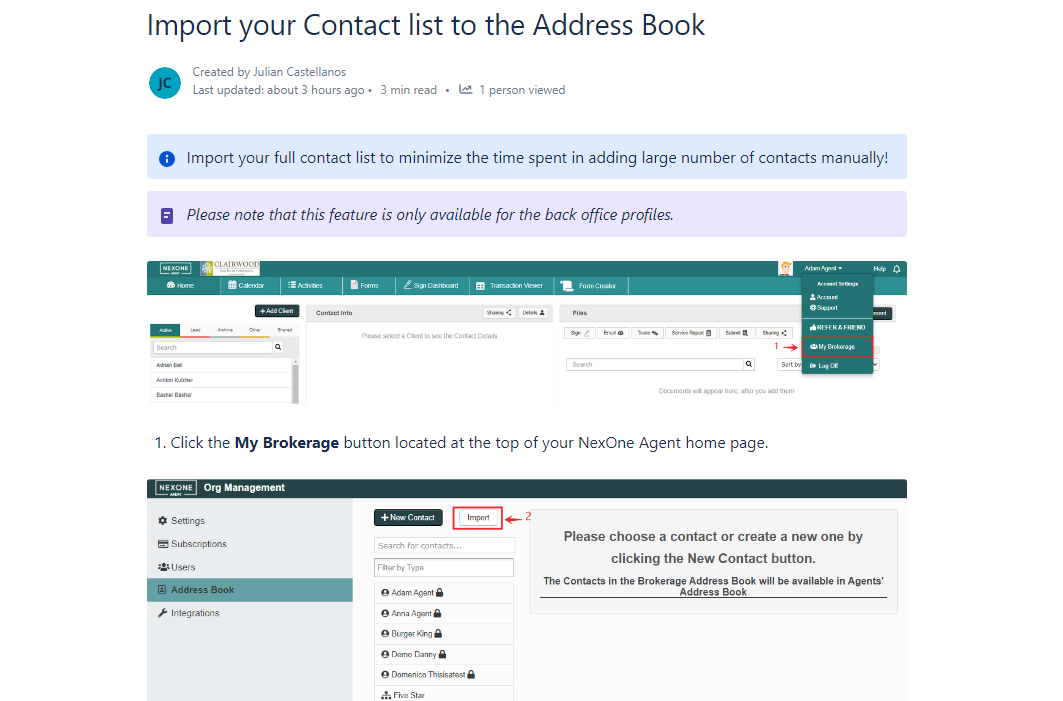
As part of the Back Office team, you will have access to importing your Brokerage's list of contacts. |
You can access the full article in the following link: Import your Contact list to the Address Book
You can access the full article in the following link: Import your Contact list to the Address Book
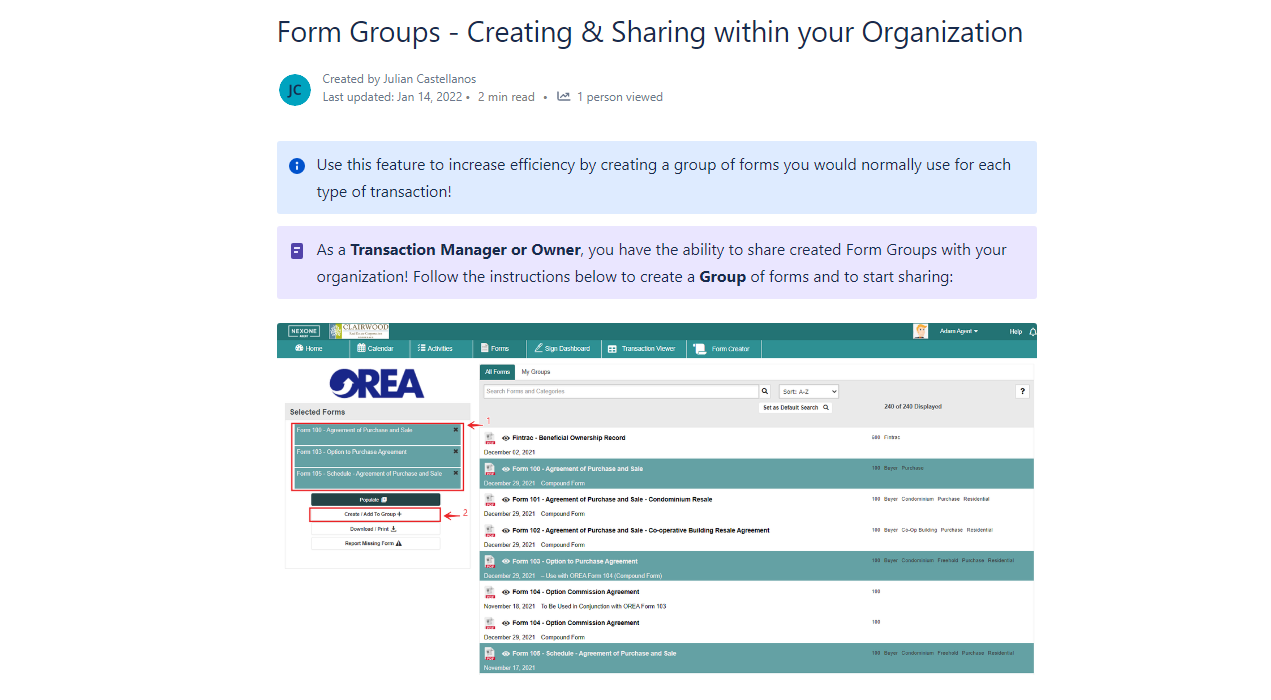
Adjust your brokerage settings to the configuration that best suits your brokerage needs. |
You can access the full article in the following link: Brokerage Settings
You can access the full article in the following link: Brokerage Settings
